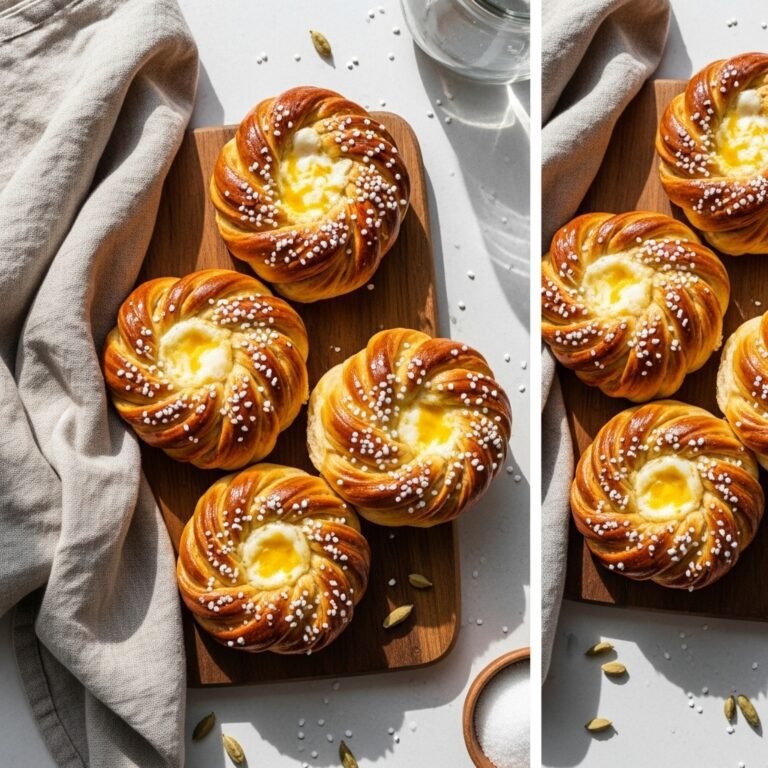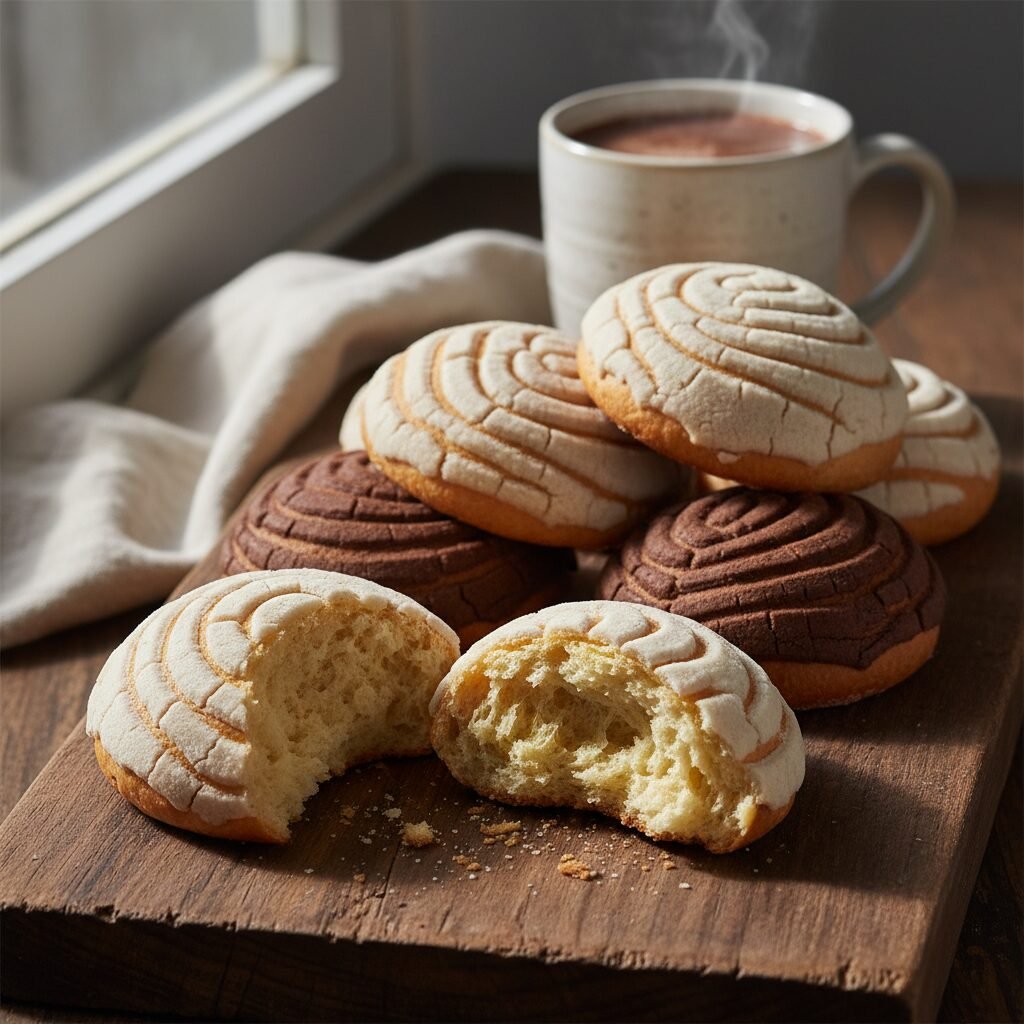
Soft & Fluffy Homemade Conchas (Mexican Sweet Bread)
Conchas Recipe
Step into your own personal panadería and fill your home with the heavenly scent of freshly baked Conchas! This recipe guides you through creating the iconic Mexican sweet bread, known for its pillowy-soft, brioche-like dough and a sweet, crackly, seashell-stamped topping. Perfect for dunking in your morning coffee or hot chocolate, these beautiful pastries are a truly rewarding baking project.
30 minutes (active)
20-25 minutes
3 hours (includes rising time)
16 conchas
Pastry
Baking
Mexican
N/A
Why You’ll Love This Recipe
- Pillowy-soft, brioche-like dough that melts in your mouth.
- Sweet, buttery, crackly streusel topping in classic vanilla and chocolate.
- A fun and rewarding baking project perfect for a weekend.
- The ultimate companion to a warm cup of coffee or Mexican hot chocolate.
Equipment You’ll Need
- Stand mixer with dough hook attachment (or a large mixing bowl)
- 2 large baking sheets
- Parchment paper
- Small saucepan
- Kitchen scale (highly recommended for accuracy)
- Measuring cups and spoons
- Bench scraper
- Small bowls for topping
- Concha stamp or a small, sharp knife
Ingredients
- For the Dough:
- 1/2 cup whole milk, warmed to about 110°F (43°C)
- 2 1/4 teaspoons (1 packet) active dry yeast
- 1/2 cup granulated sugar, divided
- 4 cups all-purpose flour, plus more for dusting
- 1 teaspoon salt
- 3 large eggs, at room temperature
- 1 teaspoon vanilla extract
- 1/2 cup (1 stick) unsalted butter, softened and cut into small pieces
- For the Vanilla Topping:
- 1/2 cup all-purpose flour
- 1/2 cup powdered sugar
- 1/4 cup (1/2 stick) unsalted butter, softened (or shortening for a crispier texture)
- 1/2 teaspoon vanilla extract
- For the Chocolate Topping:
- 1/2 cup all-purpose flour
- 1/2 cup powdered sugar
- 2 tablespoons unsweetened cocoa powder
- 1/4 cup (1/2 stick) unsalted butter, softened (or shortening)
Instructions
- Step 1: Activate the Yeast. In a small bowl or the bowl of your stand mixer, combine the warm milk, yeast, and 1 tablespoon of the granulated sugar. Gently stir and let it sit for 5-10 minutes until it becomes foamy and bubbly. This is how you know your yeast is alive and ready to work!
- Step 2: Mix the Dry Ingredients. In the bowl of your stand mixer (or a large bowl if kneading by hand), whisk together the 4 cups of all-purpose flour, the remaining granulated sugar, and the salt.
- Step 3: Combine Wet and Dry Ingredients. Add the foamy yeast mixture, the 3 room-temperature eggs, and the vanilla extract to the flour mixture. Using the dough hook attachment, mix on low speed until a shaggy dough begins to form.
- Step 4: Knead in the Butter. With the mixer on low, begin adding the softened butter, one small piece at a time, waiting until each piece is mostly incorporated before adding the next. This process takes patience, but it’s key to a rich, soft dough.
- Step 5: Knead the Dough. Once all the butter is added, increase the mixer speed to medium-low and knead for 8-10 minutes. The dough should become smooth, elastic, and slightly sticky. It should pull away from the sides of the bowl. If kneading by hand, turn the dough onto a lightly floured surface and knead for 12-15 minutes until it passes the ‘windowpane test’ (a small piece can be stretched thin enough to see light through it without tearing).
- Step 6: First Rise. Lightly grease a large bowl with oil or butter. Form the dough into a ball and place it in the bowl, turning it once to coat. Cover the bowl with plastic wrap or a damp kitchen towel. Let it rise in a warm, draft-free spot for 1.5 to 2 hours, or until it has doubled in size.
- Step 7: Prepare the Toppings. While the dough is rising, make the streusel toppings. For the vanilla topping, combine the flour, powdered sugar, softened butter, and vanilla in a small bowl. Mix with a fork or your fingertips until a smooth paste forms. For the chocolate topping, do the same in a separate bowl with its respective ingredients. Cover both and set aside.
- Step 8: Divide and Shape the Dough. Once the dough has doubled, gently punch it down to release the air. Turn it out onto a lightly floured surface and divide it into 16 equal pieces (a kitchen scale is great for this). Roll each piece into a smooth, tight ball and place them about 3 inches apart on two parchment-lined baking sheets.
- Step 9: Apply the Topping. Divide each topping flavor into 8 equal small balls. Take one ball of topping, flatten it into a thin circle (about 2-3 inches in diameter) between your palms or two pieces of parchment paper. Gently press this circle onto the top of a dough ball, ensuring it adheres well.
- Step 10: Score the Conchas. Using a concha stamp, press down firmly onto the topping to create the classic seashell pattern. If you don’t have a stamp, use a small, sharp knife or a razor blade to carefully score the pattern, being careful not to cut into the dough itself.
- Step 11: Second Rise. Cover the baking sheets loosely with plastic wrap and let the conchas rise again in a warm place for about 45-60 minutes, or until they look puffy. They won’t quite double in size this time.
- Step 12: Bake. Preheat your oven to 350°F (175°C) during the last 15 minutes of the second rise. Bake the conchas for 20-25 minutes, one sheet at a time, until they are a light golden brown on the bottom and the topping is set. The internal temperature should be around 190°F (88°C).
- Step 13: Cool and Enjoy. Let the conchas cool on the baking sheet for a few minutes before transferring them to a wire rack to cool completely. They are absolutely divine while still slightly warm!
Expert Cooking Tips
- Use a kitchen scale for measuring flour and dough portions. Baking is a science, and precision leads to perfect, consistent results every time.
- Ensure your milk is warm, not hot (around 110°F/43°C). If it’s too hot, it will kill the yeast, and your dough won’t rise.
- Be patient when adding the butter. Adding it slowly and piece by piece allows it to emulsify properly into the dough, creating that signature rich, tender crumb.
- For the topping, if it feels too sticky, add a teaspoon of powdered sugar at a time. If it’s too crumbly, add a tiny bit more softened butter. The consistency should be like a soft play-dough.
- When stamping or scoring the topping, press firmly enough to make an impression but not so hard that you deflate the risen dough.
Substitutions and Variations
For the richest flavor, unsalted butter is recommended for both the dough and topping. However, for a crispier, more traditional topping texture, you can substitute the butter with vegetable shortening. For a dairy-free version, you can try using a high-quality plant-based butter and unsweetened almond or soy milk, though the final texture and flavor may vary slightly. You can also color the vanilla topping with a drop of food coloring for a festive touch!
Common Mistakes to Avoid
The most common mistake is not kneading the dough enough. An under-kneaded dough will result in dense, heavy conchas instead of light and fluffy ones. Use the windowpane test to be sure it’s ready. Another issue is over-proofing; if the dough rises for too long during the second proof, the conchas can collapse in the oven. Keep an eye on them—they should look puffy and have increased in size, but not be enormous. Finally, don’t bake them until they are dark brown; a light golden color is perfect for maintaining a soft texture.
Serving Suggestions
Conchas are traditionally enjoyed for breakfast or as an afternoon snack (merienda). The absolute best way to eat one is to dunk it into a steaming mug of Mexican hot chocolate or a strong café de olla. They are also wonderful on their own or with a simple cup of coffee or a glass of cold milk.
Storage and Reheating Tips
Store your homemade conchas in an airtight container or a zip-top bag at room temperature. They are best enjoyed within 2-3 days. If they start to feel a little stale, you can refresh them by microwaving for 10-15 seconds, which will soften them up beautifully.
Nutrition Facts (Estimated)
| Serving Size | 1 concha |
| Calories | 285 kcal |
| Fat | 11 g |
| Saturated Fat | 6 g |
| Unsaturated Fat | 4 g |
| Trans Fat | 0 g |
| Cholesterol | 55 mg |
| Sodium | 160 mg |
| Carbohydrates | 41 g |
| Fiber | 2 g |
| Sugar | 16 g |
| Protein | 6 g |
Frequently Asked Questions
Can I make the dough ahead of time?
Yes! After the first rise, you can punch the dough down, cover it tightly, and refrigerate it for up to 24 hours. When you’re ready to bake, let it sit at room temperature for about 30-45 minutes before dividing, shaping, and proceeding with the second rise.
Why didn’t my dough rise?
This is usually due to one of two things: your yeast was expired or inactive, or the liquid used to activate it was too hot. Always check the expiration date on your yeast packet and use a thermometer to ensure your milk is at the correct temperature (around 110°F/43°C).
My topping cracked and fell off during baking. What went wrong?
This can happen if the topping is applied too thick or if it’s a bit too dry. Try to roll the topping out as thinly as you can while still being able to handle it. Also, make sure the dough balls have a very slightly tacky surface for the topping to adhere to before applying it.
Can I make these without a stand mixer?
Absolutely! It just requires more elbow grease. You can mix the ingredients in a large bowl with a wooden spoon and then turn the dough out onto a lightly floured surface to knead by hand for about 12-15 minutes until it’s smooth and elastic.
Conclusion
There’s nothing quite like the pride and pure joy of pulling a tray of perfect, golden-brown conchas from your oven. The soft, sweet bread and crunchy topping are a match made in heaven. I hope you love this recipe as much as I do. If you bake a batch, please share a photo and tag me on social media—I can’t wait to see your beautiful creations!