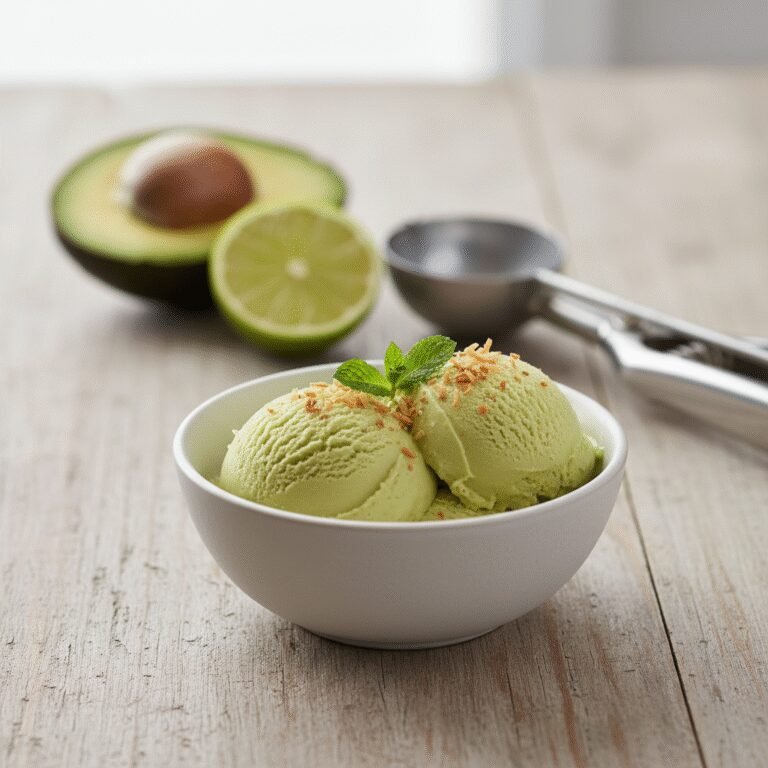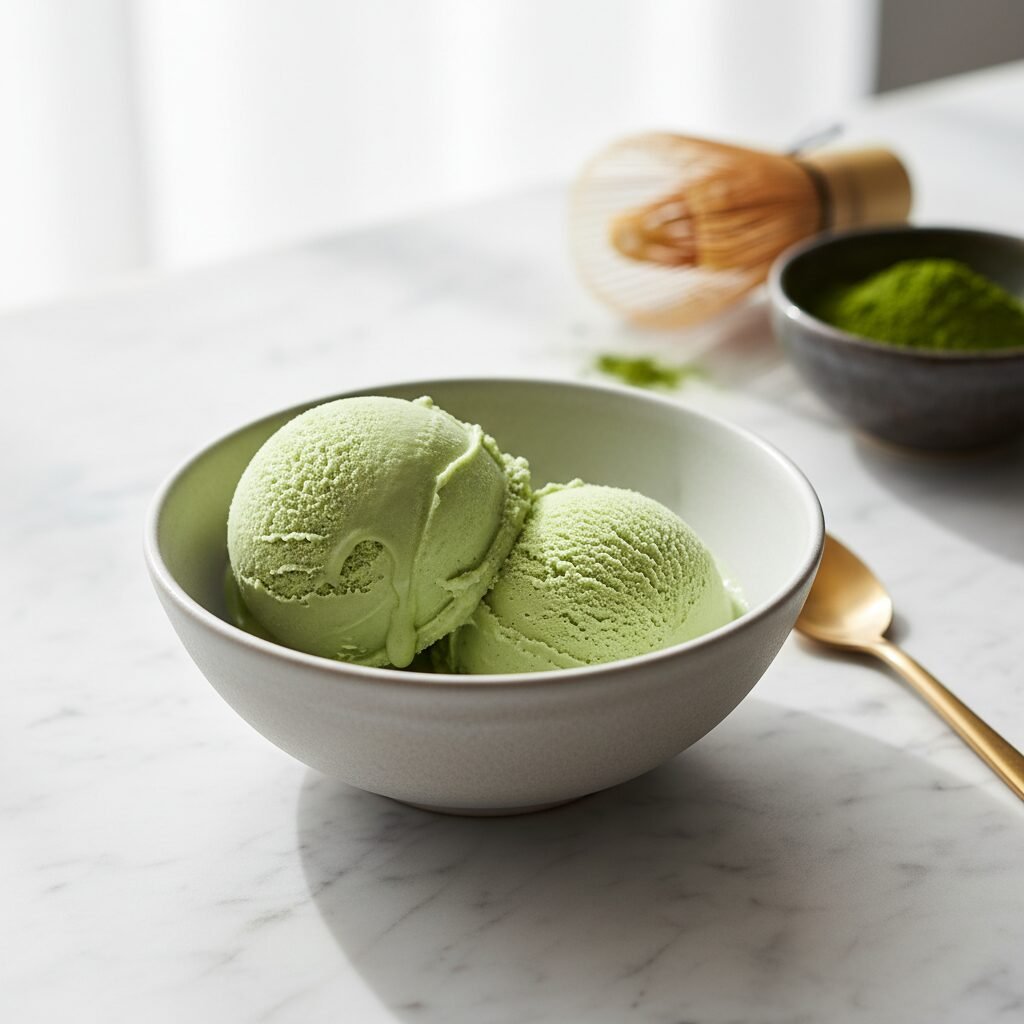
Velvety Homemade Matcha Green Tea Ice Cream
Green Tea Ice Cream Recipe
Ready to skip the specialty dessert shop? This homemade Matcha Green Tea Ice Cream is your new go-to treat! It has that perfect balance of earthy, sweet flavor wrapped in an unbelievably creamy, velvety texture. You’ll be amazed at how simple it is to whip up this vibrant, sophisticated dessert right in your own kitchen.
20 minutes
15 minutes
35 minutes (plus 4-6 hours chilling time)
1.5 quarts (about 12 servings)
Dessert
Stovetop & Ice Cream Maker
Japanese-American Fusion
N/A
Why You’ll Love This Recipe
- ✓Authentic, earthy, and perfectly sweet matcha flavor.
- ✓Incredibly rich and creamy, scoop-shop quality texture.
- ✓Surprisingly simple custard-based recipe for a gourmet result.
- ✓Stunning natural pale green color—no artificial dyes needed!
Equipment You’ll Need
- ✓Ice cream maker
- ✓Medium saucepan
- ✓Whisk
- ✓Fine-mesh sieve
- ✓Two medium mixing bowls (one for an ice bath)
- ✓Heatproof spatula
- ✓Airtight, freezer-safe container (like a loaf pan or dedicated ice cream tub)
Ingredients
- ✓2 cups heavy cream, well chilled
- ✓1 cup whole milk
- ✓3/4 cup granulated sugar, divided
- ✓1/8 teaspoon fine sea salt
- ✓5 large egg yolks
- ✓2 to 3 tablespoons high-quality matcha powder (ceremonial or culinary grade)
- ✓1 teaspoon pure vanilla extract
Instructions
- First, prepare an ice bath. Fill a large bowl with ice and a little cold water. Place a second, smaller bowl inside it and set a fine-mesh sieve over the top. This will be used to cool your custard base quickly.
- In a small bowl, whisk together the matcha powder and 1/4 cup of the granulated sugar. This helps prevent the matcha from clumping when added to the liquid. Set aside.
- In a medium saucepan, combine the heavy cream, whole milk, the remaining 1/2 cup of sugar, and the salt. Warm over medium heat, stirring occasionally, until the sugar has completely dissolved and the mixture is steaming. Do not let it boil.
- While the cream mixture is warming, whisk the egg yolks in a separate medium bowl until they become smooth and slightly pale.
- Time to temper the eggs! Slowly pour about one cup of the hot cream mixture into the egg yolks in a very thin, steady stream, while whisking constantly. This gently raises the temperature of the yolks without scrambling them.
- Pour the tempered egg yolk mixture back into the saucepan with the remaining cream. Cook over medium-low heat, stirring constantly with a heatproof spatula, scraping the bottom and sides of the pan.
- Continue cooking until the custard thickens enough to coat the back of the spatula. You should be able to draw a clean line through it with your finger. This usually takes 5-8 minutes. Do not let it simmer or boil.
- Immediately pour the hot custard through the fine-mesh sieve into the chilled bowl set over the ice bath. This catches any bits of cooked egg and ensures a silky-smooth texture.
- Whisk the matcha-sugar mixture into the strained custard until completely smooth and dissolved. Stir in the vanilla extract.
- Let the custard base cool over the ice bath for about 20 minutes, stirring occasionally. Then, cover the bowl with plastic wrap, pressing it directly onto the surface of the custard to prevent a skin from forming. Refrigerate for at least 4 hours, or preferably overnight, until thoroughly chilled.
- Once the base is completely cold, pour it into your ice cream maker and churn according to the manufacturer’s instructions, usually for 20-25 minutes, or until it reaches the consistency of thick soft-serve.
- Transfer the churned ice cream to an airtight, freezer-safe container. Press parchment paper or plastic wrap directly on the surface. Freeze for at least 2-4 hours to ‘ripen’ and firm up before serving.
Expert Cooking Tips
- ✓For the most vibrant color and smoothest flavor, use a high-quality matcha powder. Ceremonial grade offers a brilliant green and a delicate, less bitter taste, but a premium culinary grade will also yield excellent results.
- ✓Don’t rush the chilling process! A thoroughly chilled custard base (below 40°F or 4°C) is the secret to an ultra-creamy ice cream with minimal ice crystals. Chilling overnight is always best.
- ✓When tempering the eggs, a slow, steady stream of hot liquid is crucial. If you pour too fast, you risk cooking the yolks. Constant whisking is your best friend here.
- ✓Pre-chilling your freezer-safe container before transferring the churned ice cream can help it freeze faster and maintain a creamier texture.
Substitutions and Variations
For a dairy-free alternative, substitute the heavy cream with one (13.5 oz) can of full-fat coconut cream and use a creamy plant-based milk, like oat or cashew milk, for the whole milk. The final texture will be slightly icier but equally delicious. For a refined sugar-free option, you could try substituting the sugar with an equal amount of maple syrup or agave, though this will alter the final flavor and freezing point slightly.
Common Mistakes to Avoid
The biggest mistake is not chilling the custard base sufficiently before churning, which results in a grainy, icy texture. Be patient and let it get ice-cold! Another common error is overheating the custard, causing the eggs to scramble. Cook over gentle, medium-low heat and stir non-stop until it just thickens enough to coat a spoon—if you see any bubbles, it’s getting too hot.
Serving Suggestions
Serve beautiful scoops in a chilled bowl or a crispy waffle cone for a classic treat. For an elegant presentation, garnish with a sprinkle of toasted black sesame seeds, a drizzle of honey, or some fresh raspberries. It also pairs wonderfully alongside a fudgy brownie or a piece of mochi for a delightful dessert experience.
Storage and Reheating Tips
Store your homemade matcha ice cream in an airtight container deep in your freezer. To prevent ice crystals from forming on the surface, press a piece of parchment paper or plastic wrap directly onto the ice cream before securing the lid. For the best flavor and creamy texture, enjoy within two weeks.
Nutrition Facts (Estimated)
| Serving Size | 1/2 cup (approx. 90g) |
| Calories | 285 kcal |
| Fat | 18 g |
| Saturated Fat | 11 g |
| Unsaturated Fat | 7 g |
| Trans Fat | 0 g |
| Cholesterol | 150 mg |
| Sodium | 85 mg |
| Carbohydrates | 24 g |
| Fiber | 1 g |
| Sugar | 22 g |
| Protein | 5 g |
Frequently Asked Questions
Why did my ice cream turn out icy instead of creamy?
This is almost always due to the custard base not being cold enough before churning. It needs to be thoroughly chilled (at least 4 hours, but overnight is ideal). Another reason could be that your ice cream maker’s bowl wasn’t frozen solid.
Can I make this recipe without an ice cream maker?
Absolutely! For a no-churn version, pour the chilled custard base into a freezer-safe loaf pan or shallow dish. Freeze for 45 minutes, then remove and stir vigorously with a whisk or fork, breaking up any ice crystals. Repeat this process every 30-45 minutes for about 3-4 hours, until the ice cream is firm. The texture will be a bit denser but still delicious.
My matcha ice cream isn’t bright green. What went wrong?
The culprit is likely the quality or freshness of your matcha powder. Low-quality or old matcha can oxidize, losing its vibrant green color and becoming brownish with a more bitter taste. Always use fresh, high-quality matcha for the best results.
How can I make the matcha flavor stronger or milder?
This recipe is easily adjustable. For a more subtle, delicate matcha flavor, use 2 tablespoons of powder. For a bold, rich, and earthy matcha experience that true fans will love, use the full 3 tablespoons. Feel free to adjust to your personal taste!
Conclusion
And there you have it—a scoop of pure, creamy, matcha perfection, made with love in your own kitchen! This recipe proves that you don’t need to be a professional to create a truly gourmet dessert. We hope you love the serene, delicious flavor as much as we do. If you make it, please snap a picture and share it on Pinterest or Instagram—we can’t wait to see your stunning scoops!