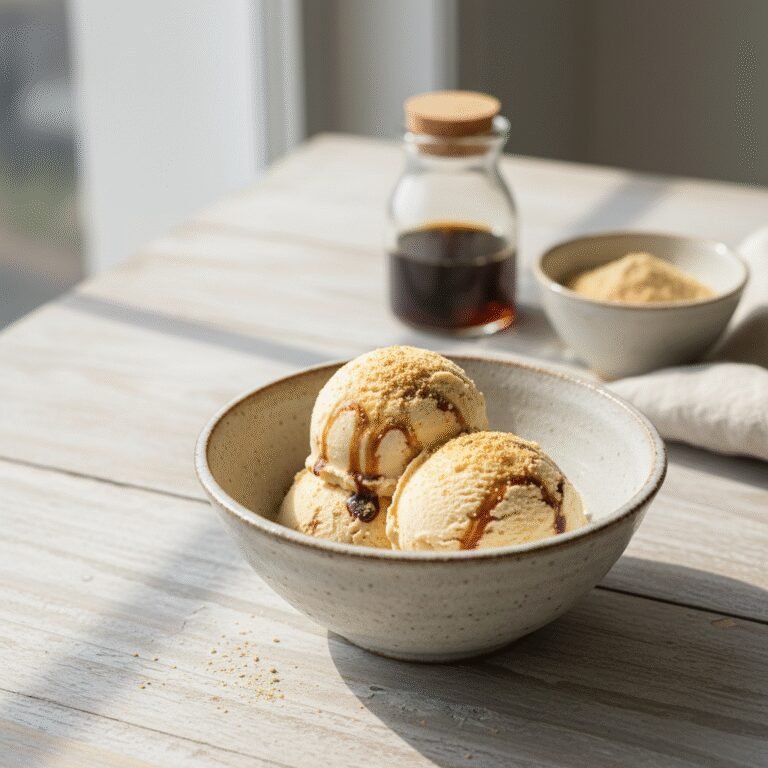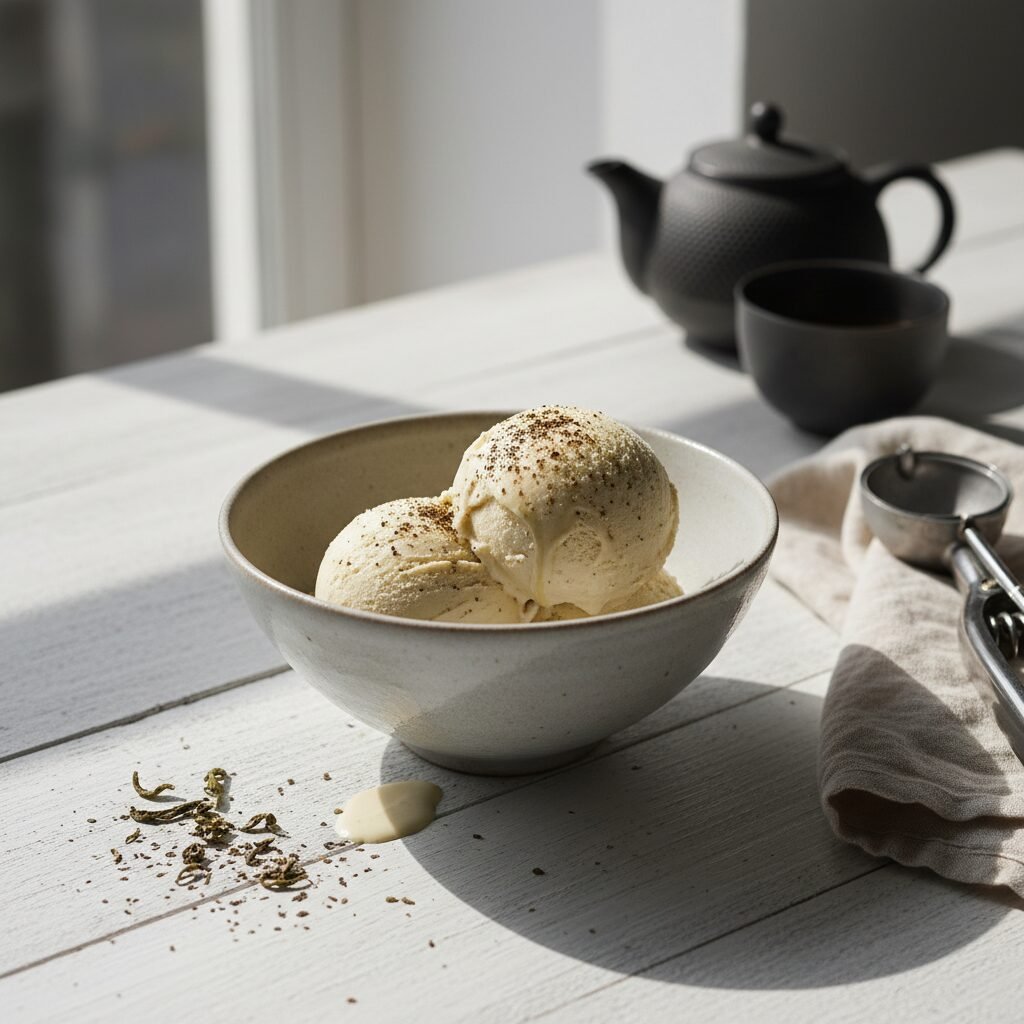
Smoky & Sweet Toasted Hojicha Ice Cream
Hojicha Ice Cream Recipe
Get ready to fall in love with your new favorite ice cream flavor! This homemade Hojicha Ice Cream is unbelievably creamy, with a uniquely smoky, nutty, and slightly sweet taste that’s both sophisticated and comforting. It’s the perfect elegant dessert to surprise your friends or to treat yourself after a long day.
20 minutes
15 minutes
8 hours (includes chilling and freezing time)
Makes about 1 quart (8 servings)
Dessert
Stovetop & Ice Cream Maker
Japanese
Gluten-Free
Why You’ll Love This Recipe
- ✓Incredibly creamy, churn-style texture
- ✓Deep, nutty, roasted tea flavor
- ✓Elegant and unique dessert
- ✓Surprisingly easy to make at home
Equipment You’ll Need
- ✓Ice cream maker
- ✓Medium saucepan
- ✓Whisk
- ✓Fine-mesh sieve
- ✓Heatproof bowl
- ✓Airtight container for freezing
- ✓Spatula
Ingredients
- ✓2 cups heavy cream
- ✓1 cup whole milk
- ✓3/4 cup granulated sugar, divided
- ✓1/4 cup loose-leaf hojicha tea
- ✓1/8 teaspoon fine sea salt
- ✓5 large egg yolks
- ✓1 teaspoon vanilla extract
Instructions
- Optional but recommended: Lightly toast the hojicha leaves in a dry medium saucepan over medium-low heat for 30-60 seconds until fragrant. This deepens the nutty flavor.
- Pour the heavy cream and whole milk into the saucepan with the toasted tea. Heat over medium heat, stirring occasionally, until the mixture is steaming and small bubbles form around the edges. Do not let it boil. Remove from heat, cover, and let the tea steep for 30 minutes.
- While the tea steeps, prepare the egg base. In a medium heatproof bowl, whisk the egg yolks with the remaining sugar (1/2 cup) and salt until the mixture is pale yellow, thick, and ribbony.
- After 30 minutes, strain the cream mixture through a fine-mesh sieve into a clean saucepan, pressing on the tea leaves to extract as much liquid as possible. Discard the leaves. Reheat the cream mixture gently over medium-low heat until it’s hot again.
- Temper the eggs: Slowly pour about one cup of the hot cream mixture into the egg yolk mixture in a thin, steady stream while whisking constantly. This gently raises the temperature of the eggs without scrambling them.
- Pour the tempered egg mixture back into the saucepan with the remaining cream. Cook over low heat, stirring constantly with a spatula, scraping the bottom and sides, for about 5-8 minutes. The custard is done when it has thickened enough to coat the back of the spatula and a line drawn with your finger holds its shape.
- Immediately pour the finished custard through the fine-mesh sieve into a clean bowl to catch any potential cooked egg bits. Stir in the vanilla extract.
- Cover the custard with plastic wrap, pressing it directly onto the surface to prevent a skin from forming. Chill in the refrigerator for at least 4 hours, but preferably overnight, until completely cold.
- Once thoroughly chilled, pour the custard base into your pre-frozen ice cream maker bowl and churn according to the manufacturer’s instructions, typically for 20-25 minutes, or until it reaches the consistency of soft-serve ice cream.
- Transfer the churned ice cream to a pre-chilled airtight container. Press a piece of parchment paper onto the surface, seal, and freeze for at least 2-4 hours to ‘ripen’ and firm up before serving.
Expert Cooking Tips
- ✓For the creamiest texture, make sure your custard base is thoroughly chilled—ideally overnight. A cold base churns faster and results in smaller ice crystals.
- ✓Don’t rush the tempering step. Pouring the hot cream mixture into the egg yolks too quickly will scramble them. Go slow and whisk constantly.
- ✓Place your airtight storage container in the freezer while the ice cream churns. Transferring the finished ice cream to a pre-chilled container helps it freeze faster and prevents iciness.
- ✓Use high-quality loose-leaf hojicha for the best, most robust flavor. Tea bags can be used in a pinch (about 8 bags), but the flavor may be less intense.
Substitutions and Variations
For a dairy-free version, use 2 cups of full-fat canned coconut cream in place of heavy cream and 1 cup of a creamy plant-based milk like oat or cashew milk for the whole milk. The flavor will have a slight coconut note, but it’s still delicious. You can experiment with maple syrup instead of granulated sugar, but be mindful that it will alter the final flavor and freezing point.
Common Mistakes to Avoid
The most common mistake is not chilling the custard base long enough before churning. A warm base will not freeze properly in the maker, resulting in a soupy, icy texture. Another pitfall is overcooking the custard, which can lead to scrambled eggs; cook just until it coats the back of a spoon and remove from heat immediately.
Serving Suggestions
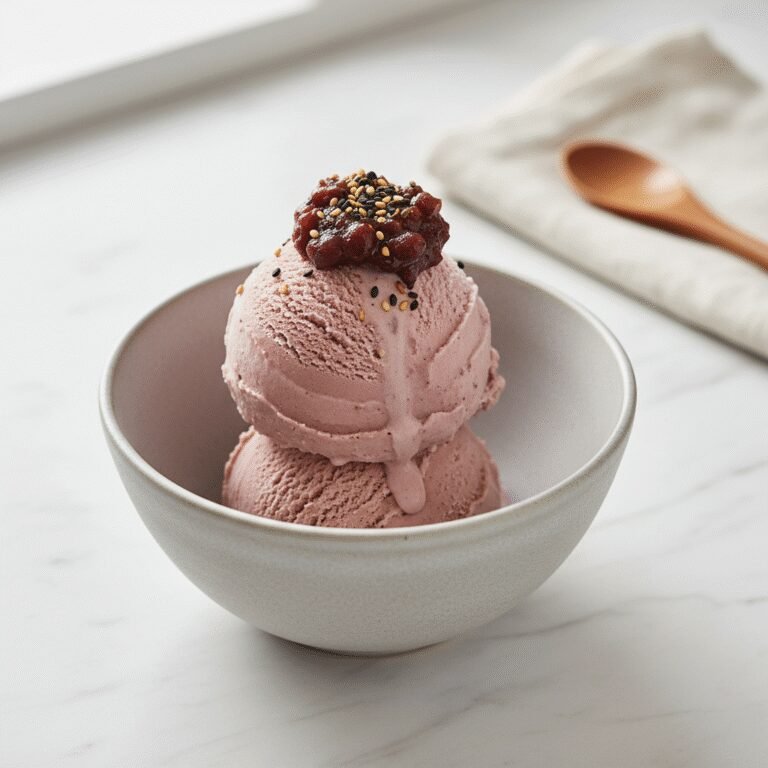
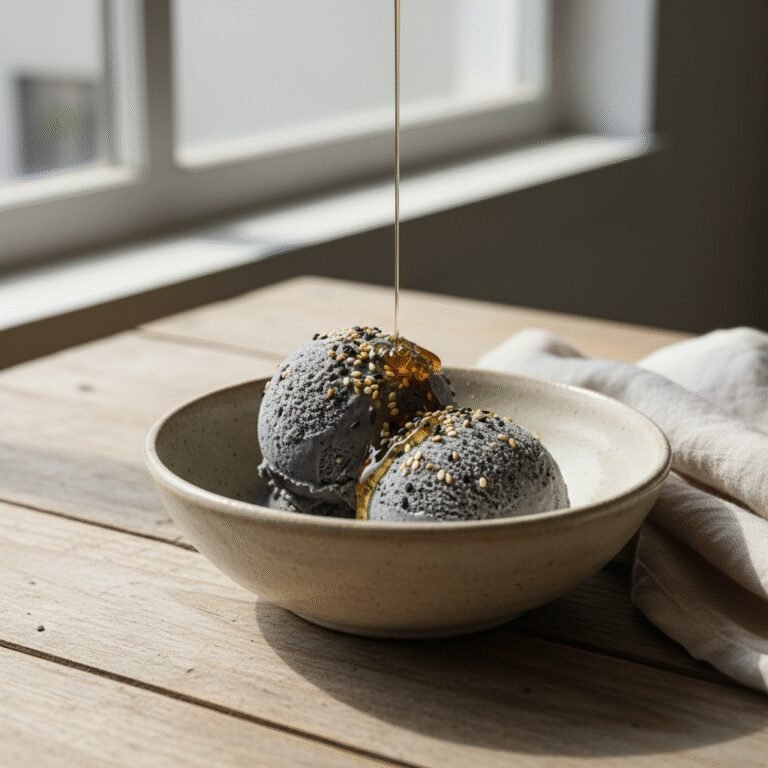
Serve a perfect scoop in a chilled bowl, perhaps drizzled with a touch of kuromitsu (Japanese brown sugar syrup) or a sprinkle of kinako (roasted soybean flour) for a complementary nutty flavor. It’s also divine alongside a warm, fudgy brownie or a slice of matcha lava cake.
Storage and Reheating Tips
Store the hojicha ice cream in an airtight container in the coldest part of your freezer (usually the back). Press a piece of parchment paper or plastic wrap directly onto the surface of the ice cream before sealing the lid to prevent ice crystals from forming. It’s best enjoyed within 2 weeks for optimal texture and flavor.
Nutrition Facts (Estimated)
| Serving Size | 1/2 cup (approx. 100g) |
| Calories | 280 kcal |
| Fat | 19 g |
| Saturated Fat | 11 g |
| Unsaturated Fat | 8 g |
| Trans Fat | 0 g |
| Cholesterol | 155 mg |
| Sodium | 80 mg |
| Carbohydrates | 24 g |
| Fiber | 0.5 g |
| Sugar | 22 g |
| Protein | 5 g |
Frequently Asked Questions
What exactly is hojicha?
Hojicha is a Japanese green tea that’s roasted over charcoal after the leaves are steamed. This roasting process gives it a reddish-brown color and a unique nutty, toasty, and slightly sweet flavor with very low caffeine compared to other green teas.
Can I make this recipe without an ice cream maker?
Yes, you can! For a no-churn method, pour the chilled custard base into a freezer-safe loaf pan. Freeze for 45 minutes, then stir vigorously with a fork, breaking up any ice crystals. Repeat this process every 30-45 minutes for about 3-4 hours, until it’s frozen but scoopable. The texture will be slightly less smooth but still delicious.
Why did my custard curdle?
The custard likely curdled because the heat was too high or it was cooked for too long. It can also happen if you don’t temper the eggs properly by adding the hot liquid too quickly. To avoid this, cook it low and slow, stirring constantly, and remove from heat as soon as it coats a spoon.
Where can I buy hojicha tea?
You can find hojicha at most Japanese or pan-Asian grocery stores, specialty tea shops, or online from various tea retailers. Look for loose-leaf hojicha for the best and most authentic flavor.
Conclusion
There’s something incredibly satisfying about making your own ice cream, and this hojicha recipe is a true showstopper. The deep, comforting flavor is unlike anything you’ll find in a store. I hope you love every creamy, smoky-sweet spoonful! If you make this recipe, I’d love to see it! Please tag me on Pinterest and Instagram so I can see your beautiful creations.