Sweet Ricotta & Marzipan Magic: A Showstopping Cassata Siciliana Recipe
Hello, fellow bakers! Today, we’re tackling a recipe that is near and dear to my heart. It’s a true celebration cake, a grand gesture, and in my opinion, the undisputed queen of all Sicilian desserts. We are making Cassata Siciliana.
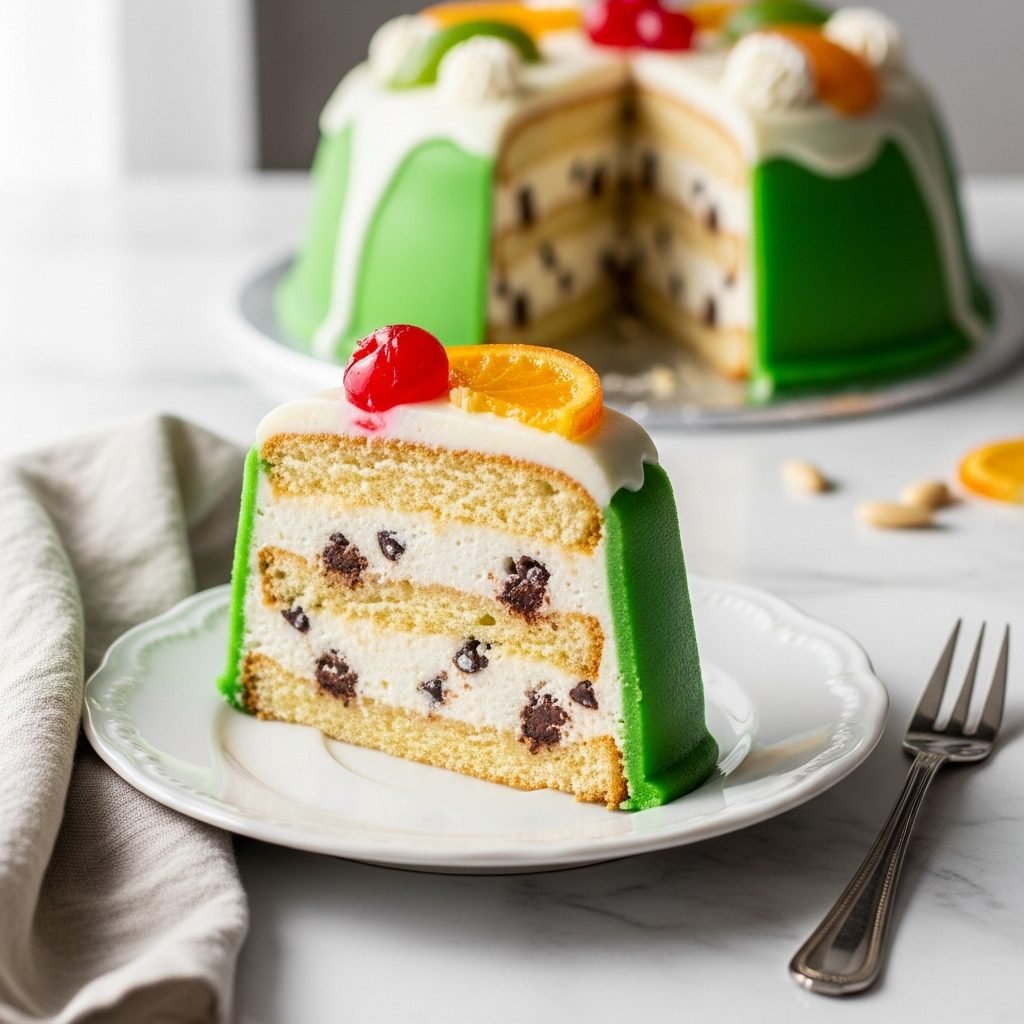
If you’ve never seen one, a cassata is a work of art. It’s a vibrant, stunning cake that looks like it’s been decorated with jewels. It features tender sponge cake, a creamy and sweet ricotta filling studded with chocolate, all wrapped in a layer of marzipan and topped with a sweet glaze and beautiful candied fruits.
I’ll be honest with you: this is not a 30-minute weeknight dessert. This is a project. This is a “labor of love” bake. It has several components, and it asks for your patience. But I am going to walk you through every single step, and I promise you, the final result is one of the most rewarding and delicious things you will ever bake.
When you bring this to the table, the entire room will stop. It’s that special. The flavor is unlike anything else—creamy, sweet, fragrant with almonds, and bright with citrus. It’s worth every moment.
Why You Will Adore This Recipe
- The Flavor: It’s a symphony. You get the soft, liqueur-brushed cake, the rich, sweet, creamy ricotta, the little pops of dark chocolate, the chewy, almond-forward marzipan, and the sweet-tart bursts from the candied fruit.
- The “Wow” Factor: This is the ultimate showstopper. The bright green marzipan, the glossy white icing, and the jewel-like fruit make it a centerpiece for any holiday, Easter, or special dinner.
- The Texture: It’s a wonderful journey—from the tender sponge to the slightly grainy (in a good way!) ricotta, the smooth glaze, and the chewy toppings.
- The Guide: This recipe is a detailed roadmap. I’ve broken down this “intimidating” cake into manageable steps, so you’ll feel guided, not overwhelmed.
Your Ingredient List
A cake this special has a few key components. I’ve broken them down for you. (A kitchen scale is highly recommended for this recipe!)
A Quick-But-Important Note on Ricotta: You must use high-quality, whole milk ricotta cheese. And it must be drained. Watery ricotta is the number one enemy of Cassata.
For the Ricotta Filling (Prep this first!)
- 2 lbs (about 4 cups) whole milk ricotta cheese
- 1 1/2 cups powdered sugar, sifted (or to taste)
- 1/2 cup mini chocolate chips
- 1/4 cup mixed candied citrus peel, finely chopped
- 1 tsp vanilla extract
- Pinch of cinnamon (optional, but lovely)
For the Sponge Cake (Pan di Spagna)
- 6 large eggs, at room temperature
- 1 cup (200g) granulated sugar
- 1 1/4 cups (150g) all-purpose flour
- 1 tsp vanilla extract
- Pinch of salt
- (Note: This cake traditionally has no leavening or fat! The air from the eggs does all the work.)
For the Liqueur Syrup
- 1/2 cup water
- 1/4 cup granulated sugar
- 1/4 cup Marsala wine, dark rum, or an orange liqueur (like Cointreau or Grand Marnier)
For Assembly & Decoration
- 1 package (about 1 lb) of marzipan (green-colored, if you can find it, or use gel food coloring)
- Powdered sugar (for rolling the marzipan)
- 2 cups powdered sugar (for the glaze)
- 3-4 tbsp water or lemon juice (for the glaze)
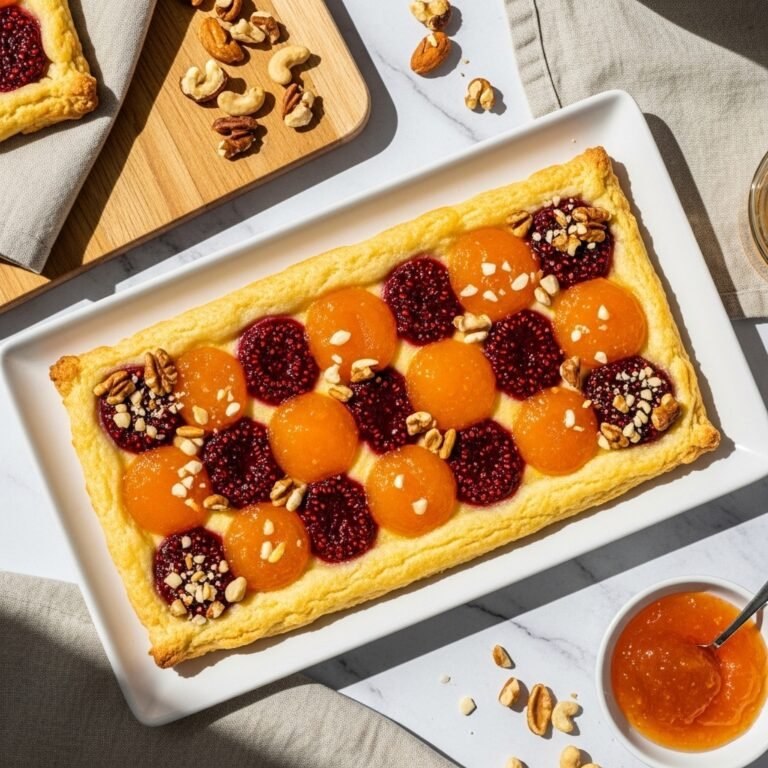
- 1 cup assorted high-quality candied fruit (such as cherries, orange slices, citron, and pears). This is not the neon-colored fruitcake mix. Look for “canditi” from an Italian market.
How to Build Your Cassata, Step-by-Step
This is a two-day process. Don’t rush it!
Day 1: Drain the Ricotta & Bake the Cake
- Drain the Ricotta (The Most Important Step): Line a fine-mesh sieve with a few layers of cheesecloth. Place it over a deep bowl. Spoon the ricotta into the cheesecloth, cover it, and place it in the refrigerator to drain for at least 12 hours, or ideally, 24 hours. You want as much liquid (whey) to drain out as possible.
- Make the Sponge Cake:
- Preheat your oven to 350°F (175°C). Grease and flour a 9-inch round springform pan (or a 9-inch regular cake pan) and line the bottom with parchment paper.
- In the bowl of a stand mixer, add the 6 room-temperature eggs and 1 cup of sugar.
- Beat with the whisk attachment on medium-high speed for 10-15 minutes. This is not a typo! You are whipping an incredible amount of air into the eggs. The mixture will become very pale, thick, and triple in volume. You’ll know it’s ready when you lift the whisk and the batter falls in a thick, slow “ribbon” that sits on the surface for a few seconds.
- In a separate bowl, sift the all-purpose flour and salt together.
- Add the vanilla to the egg mixture. Then, in three batches, sift the flour mixture over the whipped eggs. Use a large spatula to gently fold the flour in, scraping from the bottom up. Be as gentle as you can—you just beat all that air in, don’t knock it out!
- Pour the batter into your prepared pan and smooth the top.
- Bake for 30-35 minutes, or until a toothpick inserted into the center comes out clean and the cake springs back when lightly pressed.
- Let the cake cool in the pan for 15 minutes, then run a knife around the edge and invert it onto a wire rack to cool completely.
Day 2: Mix, Assemble, and Chill
- Make the Ricotta Filling: Discard the whey from the ricotta bowl. Your ricotta in the cheesecloth should be very thick and firm. Scrape this thick ricotta into a large bowl. Add the 1 1/2 cups of sifted powdered sugar, mini chocolate chips, chopped candied citrus, vanilla, and cinnamon (if using). Stir gently with a spatula until just combined. Taste it. Want it sweeter? Add a little more powdered sugar. Cover and chill this filling while you prep the rest.
- Make the Liqueur Syrup: In a small saucepan, combine the 1/2 cup water and 1/4 cup sugar. Heat and stir until the sugar is dissolved. Remove from the heat and let it cool completely, then stir in your liqueur of choice.
- Prepare the Cake Pan: You need a “mold” for your cassata. The easiest way is to use a 9-inch springform pan (the same one you baked in is fine, just clean it). Line the entire inside of the pan—bottom and sides—with plastic wrap, leaving plenty of overhang.
- Slice the Sponge Cake: Once the cake is fully cool, use a long, serrated knife to carefully slice it horizontally into three even layers. This takes patience. Go slow.
- Assemble the Cassata (The Fun Part!):
- Place one of the cake layers in the bottom of your plastic-wrap-lined pan.
- Gently and evenly, brush this layer with some of the liqueur syrup. Don’t drench it, just moisten it.
- Spoon half of the ricotta filling onto the cake layer and spread it into an even layer.
- Place the second cake layer on top of the ricotta. Gently press it down.
- Brush this second layer with the liqueur syrup.
- Spoon the rest of the ricotta filling on top and spread it out.
- Place the third and final cake layer on top.
- Brush this top layer with the last of the liqueur syrup.
- Fold the overhanging plastic wrap tightly over the top of the cake.
- CHILL (Non-Negotiable): This is the second-most important step! Place the entire pan in the refrigerator. You need to chill it for at least 6 hours, but overnight is so much better. This allows the cake to absorb the flavors, and the ricotta filling to become very firm.
Day 3: Decorate and Serve!
- Unmold the Cake: This is the magic moment. Open the plastic wrap on top. Place a large, flat serving platter upside-down on top of the pan. In one confident motion, flip the pan and the platter over. Release the springform pan’s clasp. Lift the pan and the plastic wrap “mold” away. You should have a perfectly round, firm, three-layer cake.
- Apply the Marzipan:
- If your marzipan isn’t green, add a few drops of green gel food coloring and knead it until it’s a uniform, pale pistachio color.
- Dust your work surface liberally with powdered sugar (so it doesn’t stick). Roll the marzipan into a long, thin rectangle, about 4 inches wide (or as tall as your cake) and long enough to wrap around the entire 9-inch cake (about 28-29 inches).
- Carefully trim the edges to get a clean strip.
- Gently press this marzipan “ribbon” around the entire side of the cake. Trim any excess and press the seam together.
- Glaze the Top:
- In a small bowl, whisk the 2 cups of powdered sugar with 3 tablespoons of liquid (water or lemon juice). You are looking for a thick, but pourable, white glaze (like school glue). If it’s too thick, add more liquid one drop at a time.
- Pour the glaze onto the center of the cake top. Use an offset spatula to gently spread it to the edges, letting it just sit on top (it’s okay if a tiny bit drips, but it’s meant to stay on top). Work quickly, as it will set.
- Decorate: This is your time to be an artist. While the glaze is still wet, arrange your beautiful candied fruits on top in a decorative, jewel-like pattern. Symmetrical designs are traditional.
- CHILL AGAIN: Place the finished cake back in the fridge, uncovered, for at least 1 hour to let the glaze set completely.
Helpful Tips for Cassata Success
- Drain That Ricotta! Have I said this enough? Watery ricotta will make your cake a soggy, weeping mess. Give it the full 24 hours.
- Embrace the “Project”: This is a 3-day cake. Don’t try to do it all in one day. Day 1: Bake & Drain. Day 2: Assemble & Chill. Day 3: Decorate & Serve.
- Be Gentle: When folding the flour into your sponge, use a light hand. You’re preserving the air you just whipped in.
- Powdered Sugar is Your Friend: When rolling marzipan, you can’t use too much powdered sugar on your work surface and rolling pin. It’s sticky!
- Use a Hot Knife: To get those beautiful, clean slices that show off the layers, dip a long, sharp knife in hot water, wipe it dry, and then make your cut. Repeat for every single slice.
Ingredient Substitutions & Options
- Non-Alcoholic Version: No problem! For the syrup, just use a simple sugar syrup (1:1 sugar and water) and add 1/2 tsp of orange blossom water or a teaspoon of Fiori di Sicilia (a citrus-vanilla extract). You could also use a little orange juice.
- Hate Marzipan? This is a tough one, as it’s a key flavor. It won’t be a traditional cassata, but you could ice the sides with a simple buttercream or even a whipped cream frosting.
- Gluten-Free Cassata: The sponge cake can be made with a high-quality 1-to-1 gluten-free baking flour blend. The rest of the ingredients are naturally gluten-free (just check your chocolate chips and marzipan).
- Store-Bought Sponge: If you’re really in a pinch, you can use a store-bought sponge or pound cake. It won’t have the same light texture, but it will work.
Common Mistakes to Avoid
- Runny Filling: You didn’t drain the ricotta. (Sorry, I had to say it one last time).
- Cake Collapses When Unmolded: You didn’t chill it long enough. The 6-hour (or overnight) chill is structural. It’s what firms up the filling so it can stand on its own.
- Soggy Cake: You used way too much syrup. You want to brush the cake, not drench it.
- Lumpy Glaze: You didn’t sift your powdered sugar.
- Ugly Candied Fruit: You used the neon-red and green “fruitcake mix.” This is a splurge cake! Seek out the good “canditi”—the translucent, deeply-flavored, high-quality Italian candied fruits.
How to Serve Your Masterpiece
This cake is a standalone star. It needs nothing else… except maybe a tiny glass of Marsala, Vin Santo, or a strong, dark espresso.
Always serve it chilled, straight from the refrigerator. The beauty is in the slice, so present it whole and then make a show of cutting it at the table.
Storing Your Cassata
This cake must be stored in the refrigerator. It’s a dairy-based dessert.
- In the Fridge: Store any leftover cake in an airtight container (or a cake box) in the fridge for up to 4 days. Honestly, it tastes even better on Day 2, as all the flavors have had time to get to know each other.
- In the Freezer: Yes, you can freeze cassata! It freezes surprisingly well. You can freeze the whole cake (before glazing/decorating is best) or individual slices. Wrap them tightly in plastic wrap, then in foil. It will last for up to 2 months. Thaw overnight in the refrigerator.
Your Cassata Questions
What does Cassata actually mean? It’s a bit of a mystery! Some say it comes from the Arabic word “qas’at” (a bowl), which would make sense, as it was traditionally made in a bowl-shaped pan.
Can I make my own marzipan? You absolutely can! It’s just almond flour, powdered sugar, and an egg white or corn syrup. But to keep this recipe from becoming a week-long project, I find store-bought is a great, reliable shortcut.
My ricotta still seems grainy, why? Some ricotta brands are naturally grainier than others. That texture is actually part of the charm! It’s not meant to be silky-smooth like a cheesecake. If it’s unpleasantly grainy, you can give the filling a very quick buzz with a food processor, but I prefer the traditional texture.
A Final Thought
Whew! That was a journey, wasn’t it? I know this recipe is a commitment, but it’s one of those bakes that will stay with you. It’s a taste of history, a celebration on a plate, and a project that will make you feel like a true pastry chef.
Don’t be afraid of the steps. Just take them one by one. And when you’re done, please, pat yourself on the back… and then eat a giant slice.
Quick Recipe Summary
This showstopping Cassata Siciliana recipe guides you through creating the classic Italian dessert. It features three layers of homemade sponge cake (Pan di Spagna) brushed with a liqueur syrup, filled with a thick, sweet ricotta and chocolate chip filling, and then chilled. The cake is then encased in a green marzipan ribbon, topped with a simple sugar glaze, and decorated with beautiful candied fruits.