Buttery Norwegian Sandbakkels With Crisp Edges and Tender Centers
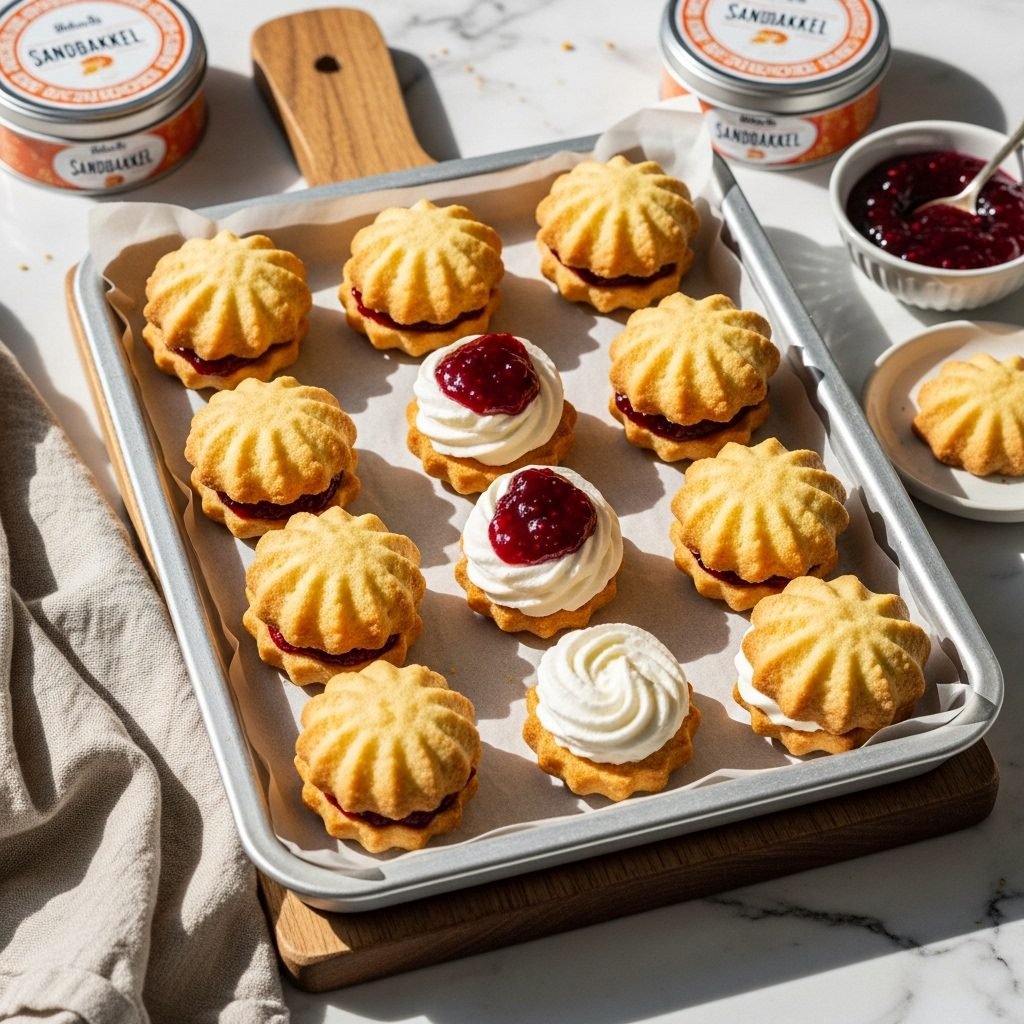
Sandbakkels are the kind of cookie that feel like they’ve lived a hundred holiday seasons—simple, delicate, and shaped with care. These tiny Norwegian tart-like cookies bake up golden and crisp around the edges, with a soft, buttery center that melts gently on your tongue. Pressing dough into the traditional fluted tins is almost meditative, and the result is a batch of little cookie shells that look charming on any dessert table.
Why You’ll Love This Recipe
Sandbakkels may look fancy, but they’re wonderfully straightforward. The dough uses just a few ingredients, and the shaping is easy once you get the feel for it. Each cookie has a warm, homey flavor—rich butter, a touch of almond, and the kind of texture you only get from handmade holiday treats.
Recipe Highlights
- Taste: Lightly sweet, buttery, crisp along the edges, tender inside.
- Time: About 15 minutes to mix + 10–12 minutes to bake.
- Difficulty: Beginner-friendly with a hands-on shaping step.
- Special Touch: Their signature fluted, cup-like shape made with Sandbakkel tins.
Ingredients
- 1 cup unsalted butter, softened
- 1 cup granulated sugar
- 1 large egg
- 1/2 tsp almond extract (or vanilla)
- 2 1/2 cups all-purpose flour
- Pinch of salt
Step-by-Step Instructions
- Cream the butter and sugar. Beat the softened butter and sugar until light and fluffy.
- Add egg and extract. Mix in the egg and almond extract until smooth.
- Add flour. Add the flour and salt gradually, mixing until a soft dough forms.
- Chill the dough. Refrigerate for 30 minutes to make shaping easier.
- Prepare the tins. Lightly grease the Sandbakkel tins.
- Shape the cookies. Press small portions of dough into each tin, pushing evenly up the sides. The layer should be thin—too thick and the cookies won’t crisp.
- Bake. Preheat your oven to 375°F. Place the tins on a baking sheet and bake for 10–12 minutes, or until the edges are lightly golden.
- Cool and release. Let the cookies cool slightly, then gently tap or press to release them from the tins.
Helpful Cooking Tips
- Thin, even dough makes the crispiest shells.
- Don’t overfill the tins—Sandbakkels should be delicate, not thick.
- Cool the cookies before removing to prevent breaking.
- Rotate the baking sheet halfway through if your oven browns unevenly.
Ingredient Substitutions & Dietary Options
- Flavor extract: Swap almond for vanilla, lemon, or orange.
- Butter substitute: Plant-based butter works for a dairy-free batch.
- Gluten-free: Use a 1:1 gluten-free flour blend, but reduce by 2–3 tbsp if the dough feels dry.
- Add-ins: Sprinkle a pinch of cardamom into the dough for a Scandinavian twist.
Common Mistakes to Avoid
- Dough too thick: Thick shells stay soft instead of crisp.
- Removing too early: Warm cookies are fragile—let them cool slightly.
- Underbaking: The edges should be just golden for the best texture.
- Skipping the chill: Chilled dough presses more smoothly into the tins.
Serving Suggestions
Serve Sandbakkels plain, or fill them with jams, whipped cream, lemon curd, or chocolate mousse. They’re lovely on holiday cookie trays, at winter brunches, or alongside tea or coffee on a quiet afternoon.
Storage & Reheating Tips
- Store in an airtight container for up to 1 week.
- Freeze unfilled Sandbakkels for up to 2 months.
- Refresh briefly in a 300°F oven to re-crisp.
FAQ
Do I need Sandbakkel tins? Yes—traditional tins create the signature shape.
Why did my cookies stick? They may not have cooled enough, or the tins needed a light grease.
Can I make them ahead? Absolutely—these cookies store well and can be filled later.
Final Thoughts
Sandbakkels capture everything cozy about Scandinavian baking—simple ingredients, quiet shaping, and a result that’s both beautiful and delicious. They’re the kind of cookie that turns a small baking moment into a warm holiday memory.
Quick Summary
Crisp, buttery Norwegian cookie shells shaped in fluted tins—delicate, lightly sweet, and perfect for filling or enjoying plain.
If you enjoyed this recipe, feel free to share it on Pinterest or your favorite social platform so others can bake them too!