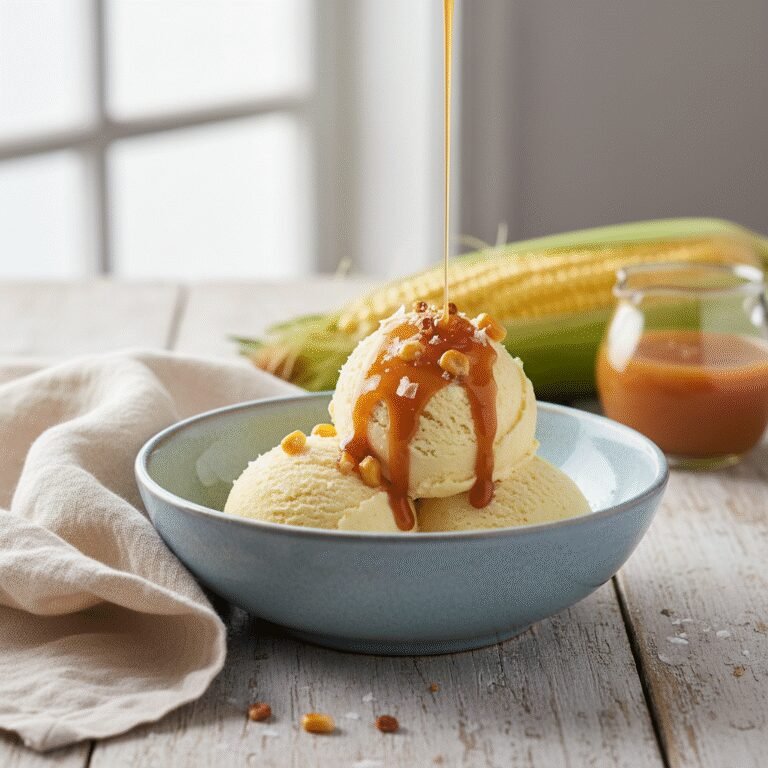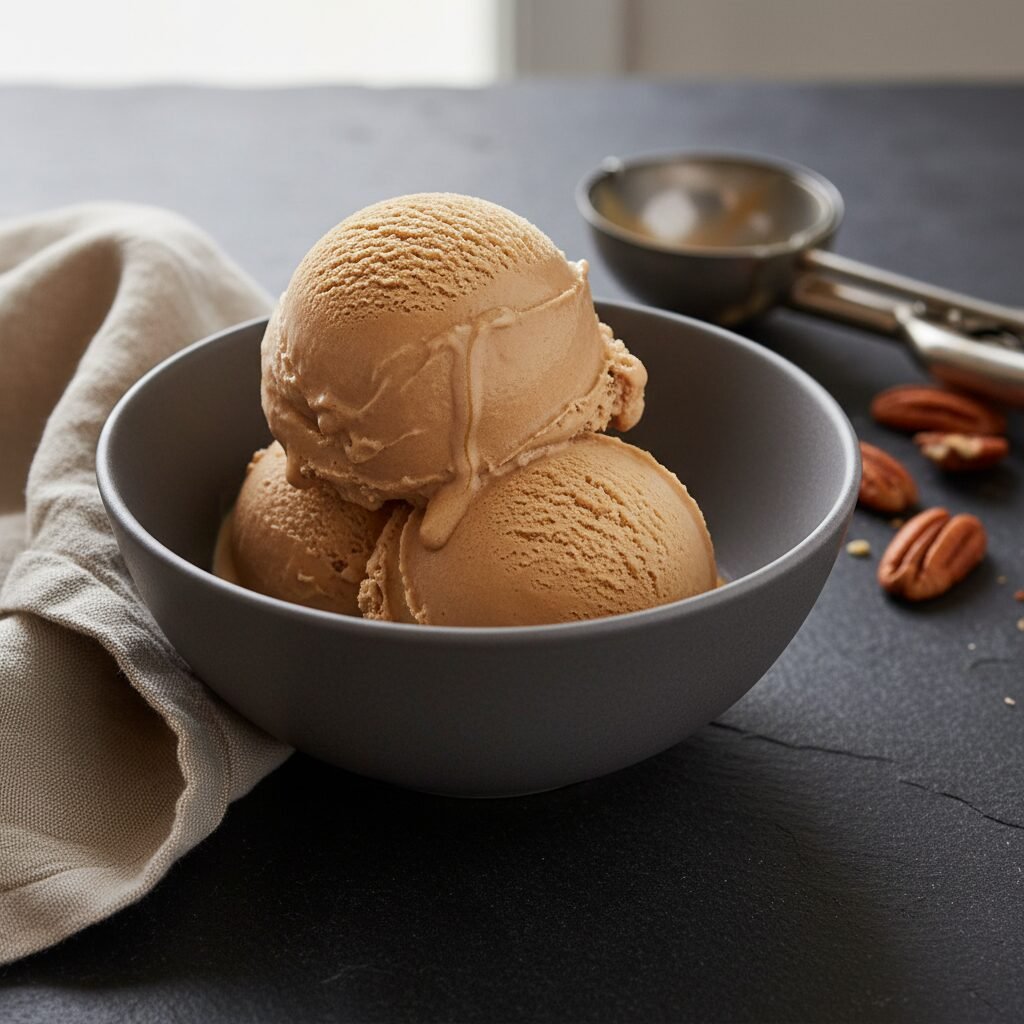
Smoky-Sweet Burnt Sugar Ice Cream
Burnt Sugar Ice Cream Recipe
Get ready to fall in love with your new favorite dessert! This Burnt Sugar Ice Cream has a beautifully complex, smoky-sweet flavor that’s like a sophisticated, grown-up version of caramel. Its velvety smooth, creamy texture is pure bliss and surprisingly simple to create in your own kitchen.
25 minutes
15 minutes
8 hours 40 minutes (includes 8 hours chilling and freezing time)
1.5 quarts (about 12 servings)
Dessert
Stovetop & Ice Cream Maker
American
N/A
Why You’ll Love This Recipe
- ✓Deep, complex toffee-like flavor with a hint of smokiness
- ✓Incredibly rich and velvety churn-style texture
- ✓A show-stopping dessert made with simple pantry staples
- ✓Perfect for impressing guests or as a special treat
Equipment You’ll Need
- ✓Ice cream maker
- ✓Heavy-bottomed 2-quart saucepan
- ✓Medium saucepan
- ✓Whisk
- ✓Heatproof spatula
- ✓Fine-mesh sieve
- ✓Large bowl (for ice bath)
- ✓Medium heatproof bowl
- ✓Airtight, freezer-safe container (1.5 to 2 quarts)
Ingredients
- ✓1 cup granulated sugar, divided
- ✓1/4 cup water
- ✓2 cups heavy cream
- ✓1 cup whole milk
- ✓1/2 teaspoon kosher salt
- ✓6 large egg yolks
- ✓1 teaspoon pure vanilla extract
Instructions
- Prepare an ice bath: Fill a large bowl with ice and a little water. Set a medium bowl inside the ice bath and place a fine-mesh sieve over the top. Set aside.
- Make the burnt sugar: In a heavy-bottomed saucepan, combine 3/4 cup of the sugar and 1/4 cup of water. Cook over medium-high heat, swirling the pan occasionally but not stirring, until the sugar dissolves and the syrup turns a deep amber color, like a copper penny. Watch it closely; it will start to smoke slightly right before it’s ready. This should take about 8-10 minutes.
- Stop the cooking: Immediately remove the pan from the heat and carefully whisk in 1 cup of the heavy cream. The mixture will bubble and seize violently—this is normal! Keep whisking until it’s smooth. If any hardened bits remain, return the pan to low heat and stir until they dissolve.
- Create the custard base: Whisk the remaining 1 cup of heavy cream, the whole milk, and the kosher salt into the burnt sugar mixture. Heat over medium heat until it is warm and steaming, but not boiling.
- Temper the eggs: In a separate medium bowl, whisk the egg yolks with the remaining 1/4 cup of sugar until pale and slightly thickened.
- Combine and cook: While whisking constantly, slowly pour about one cup of the warm cream mixture into the egg yolks to temper them. Then, pour the tempered egg mixture back into the saucepan with the rest of the cream.
- Thicken the custard: Cook over medium-low heat, stirring constantly with a heatproof spatula, scraping the bottom and corners of the pan. Continue until the custard thickens enough to coat the back of the spatula (about 170°F on an instant-read thermometer). Do not let it boil.
- Strain and chill: Immediately pour the finished custard through the fine-mesh sieve into the chilled bowl set over the ice bath. Stir in the vanilla extract. Let the custard cool over the ice bath, stirring occasionally, for about 20 minutes.
- Chill thoroughly: Cover the bowl with plastic wrap, pressing it directly onto the surface of the custard to prevent a skin from forming. Refrigerate for at least 4 hours, or preferably overnight, until completely cold.
- Churn the ice cream: Pour the cold custard base into your ice cream maker and churn according to the manufacturer’s instructions, usually about 20-25 minutes, until it reaches the consistency of soft-serve.
- Harden (Ripen): Transfer the churned ice cream to a pre-chilled airtight container. Press a piece of parchment paper against the surface. Freeze for at least 4 hours, or until firm.
Expert Cooking Tips
- ✓Don’t fear the ‘burnt’ part! You want a deep, dark amber color for that signature complex flavor. If it’s pale, it’s just caramel. If it’s black, it’s gone too far. A tiny wisp of smoke is your cue that it’s perfect.
- ✓A heavy-bottomed saucepan is non-negotiable for making the caramel. It distributes heat evenly and prevents scorching.
- ✓Patience is key for chilling. A thoroughly chilled custard base (below 40°F) is the secret to the creamiest, smoothest texture and prevents iciness.
- ✓Freeze the storage container for at least 30 minutes before transferring the churned ice cream into it. This helps it freeze faster and minimizes ice crystal formation.
Substitutions and Variations
This recipe’s texture relies heavily on the fat and protein from dairy and eggs, so substitutions can be tricky. For a dairy-free version, you can try using a high-quality, full-fat canned coconut cream and coconut milk in place of the heavy cream and whole milk, but expect a noticeable coconut flavor and a slightly different texture. Unfortunately, sugar substitutes will not caramelize properly for the burnt sugar base.
Common Mistakes to Avoid
The biggest mistake is taking your eyes off the sugar as it caramelizes—it can go from perfect to acrid and bitter in seconds. Another common pitfall is not chilling the custard base long enough before churning; a warm base will result in a soupy, icy final product instead of a creamy one. Finally, be careful not to scramble the eggs when tempering; pour the hot liquid in a very slow, steady stream while whisking constantly.
Serving Suggestions
This ice cream is divine on its own, but it truly shines when paired with complementary flavors. Serve a scoop on top of a warm, fudgy brownie, alongside a slice of apple or pecan pie, or with a simple shortbread cookie. For a final touch, sprinkle with flaky sea salt or a handful of toasted pecans to add texture and enhance the nutty caramel notes.
Storage and Reheating Tips
Store your homemade ice cream in an airtight container deep in your freezer, where the temperature is most consistent. To prevent ice crystals, press a layer of plastic wrap or parchment paper directly onto the surface of the ice cream before sealing the lid. For the best flavor and texture, enjoy within two weeks.
Nutrition Facts (Estimated)
| Serving Size | 1/2 cup |
| Calories | 265 kcal |
| Fat | 17 g |
| Saturated Fat | 10 g |
| Unsaturated Fat | 7 g |
| Trans Fat | 0 g |
| Cholesterol | 110 mg |
| Sodium | 125 mg |
| Carbohydrates | 24 g |
| Fiber | 0 g |
| Sugar | 23 g |
| Protein | 4 g |
Frequently Asked Questions
What does ‘burnt sugar’ actually taste like? Is it bitter?
It’s not burnt in a bad way! It has a wonderfully complex flavor that’s much deeper than regular caramel. Think toasty, nutty, and smoky with a pleasant, very slight bitterness that balances the sweetness, similar to dark chocolate or good coffee.
Why did my sugar mixture seize up and get hard?
This happens when the cold cream hits the hot sugar, causing it to rapidly cool and solidify. It’s completely normal! Just return the pan to low heat and continue to stir gently until all the hardened caramel has melted back into the cream.
Can I make this recipe without an ice cream maker?
Yes, you can use a no-churn method. Pour the chilled custard base into a shallow, freezer-safe dish (like a loaf pan). Freeze for 45 minutes, then remove and stir vigorously with a whisk to break up ice crystals. Repeat this process every 30-45 minutes for 3-4 hours, until it’s firm. The texture will be slightly denser but still delicious.
Conclusion
There you have it—a truly special ice cream that’s bound to become a new favorite. The deep, toasted flavor of burnt sugar is an unforgettable experience that’s well worth the effort. If you make this recipe, I’d love to see it! Please snap a photo and share it on Pinterest or Instagram, and don’t forget to tag us!