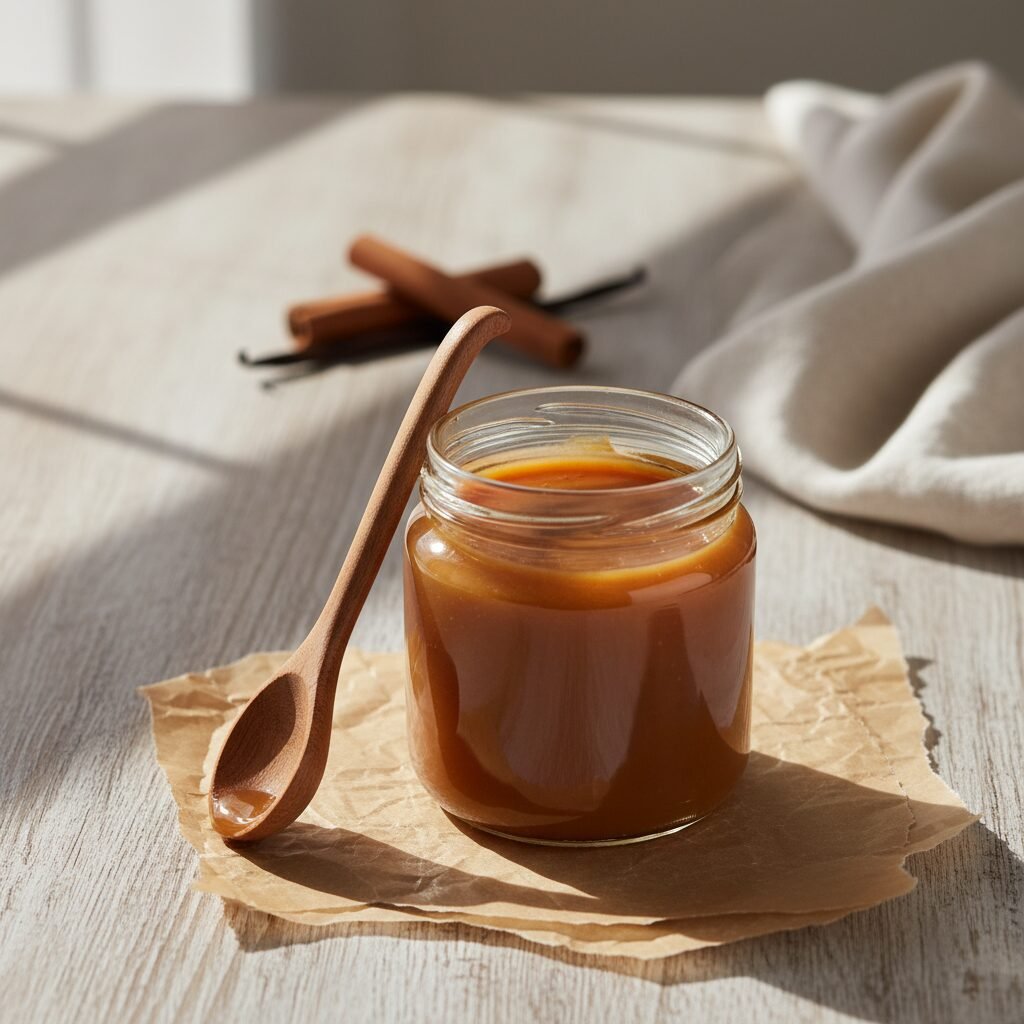
Silky Slow-Cooked Cajeta: The Dreamy Mexican Caramel Sauce
Cajeta Recipe
Get ready to fall in love with the most incredible, velvety caramel sauce you’ve ever tasted! This homemade cajeta, a traditional Mexican confection made from goat’s milk, boasts a deep, complex flavor with nutty, tangy notes you just can’t get from regular caramel. It’s a slow-simmered labor of love that is surprisingly simple to make and will absolutely transform your desserts, breakfasts, and coffee.
5 minutes
1 hour 30 minutes
1 hour 35 minutes
About 2 cups
Dessert Sauce
Stovetop
Mexican
N/A
Why You’ll Love This Recipe
- Rich, tangy, and nutty flavor profile.
- A simple, one-pot recipe with just 5 ingredients.
- Incredibly versatile for drizzling, dipping, and baking.
- Keeps for weeks in the fridge for an instant treat.
Equipment You’ll Need
- Large, heavy-bottomed pot or Dutch oven (at least 4-quart)
- Whisk
- Heatproof spatula
- Glass jar with a tight-fitting lid for storage
Ingredients
- 4 cups (1 quart) whole goat’s milk
- 1 1/4 cups granulated sugar
- 1 whole vanilla bean, split lengthwise, or 1 teaspoon pure vanilla extract
- 1 cinnamon stick (preferably Mexican canela)
- 1/4 teaspoon baking soda dissolved in 1 tablespoon of water
Instructions
- In a large, heavy-bottomed pot or Dutch oven, combine the goat’s milk, sugar, cinnamon stick, and the scraped seeds from the vanilla bean (toss the pod in, too!).
- Place the pot over medium heat. Whisk gently until the sugar has completely dissolved. You don’t want any gritty texture at the bottom.
- Bring the mixture to a gentle simmer, but do not let it come to a rolling boil. Watch it carefully at this stage.
- Once simmering, remove the pot from the heat for a moment and carefully stir in the dissolved baking soda mixture. The mixture will foam up significantly – this is normal! The baking soda helps prevent the milk from curdling and contributes to the beautiful brown color.
- Return the pot to the stove and reduce the heat to low. You want to maintain a very gentle simmer, with just a few bubbles breaking the surface.
- Now comes the patient part. Let the mixture simmer for 1.5 to 2 hours, stirring every 10-15 minutes with a heatproof spatula, making sure to scrape the bottom and sides of the pot to prevent scorching.
- As it cooks, the cajeta will gradually darken in color, from a pale cream to a beautiful deep amber or mahogany, and it will thicken considerably.
- You’ll know it’s ready when it has the consistency of a thick syrup and coats the back of a spoon. To test it, you can drop a small amount onto a chilled plate; it should hold its shape and not run excessively.
- Once it reaches the desired consistency, carefully remove the pot from the heat. Fish out the cinnamon stick and the vanilla bean pod.
- If you used vanilla extract instead of a bean, stir it in now, off the heat.
- Let the cajeta cool in the pot for about 15-20 minutes. It will continue to thicken as it cools.
- Pour the warm cajeta into a clean glass jar. Let it cool to room temperature before sealing with a lid and storing in the refrigerator.
Expert Cooking Tips
- Use the largest, heaviest pot you have. A 4-quart or larger Dutch oven is perfect. This prevents boilovers when the baking soda is added and ensures even heat distribution to prevent scorching.
- Patience is key. Don’t be tempted to crank up the heat to speed up the process. A low, slow simmer is essential for developing the deep, complex flavors and achieving a silky-smooth texture.
- Stir, stir, stir! Especially during the last 30 minutes of cooking, the mixture will be thicker and more prone to sticking and burning. Scrape the bottom and sides diligently.
- To test for doneness like a pro, use the ‘cold plate’ test. Keep a small plate in the freezer. When you think the cajeta is ready, place a small drop on the cold plate and wait 30 seconds. Tilt the plate; if the drop runs very slowly, it’s done. If it’s watery, keep cooking.
Substitutions and Variations
The signature tangy flavor of cajeta comes from goat’s milk, and it’s highly recommended for the most authentic result. However, if you absolutely cannot find it, you can substitute whole cow’s milk. The result will be a delicious dulce de leche, which is slightly sweeter and lacks the characteristic tang of cajeta. For the sugar, you can use piloncillo (Mexican brown sugar) for an even deeper, more molasses-like flavor; you’ll need to chop it and weigh it to get an equivalent amount. If you don’t have a vanilla bean, 1 teaspoon of high-quality pure vanilla extract can be stirred in at the very end, after removing the pot from the heat.
Common Mistakes to Avoid
The most common mistake is impatience, which leads to two problems: scorching or undercooking. Using a heat that is too high will cause the milk solids and sugar to burn on the bottom of the pot, creating a bitter taste and gritty texture. Conversely, not cooking it long enough will result in a thin, watery sauce that doesn’t have the rich, thick consistency cajeta is known for. Another potential pitfall is not using a large enough pot. The baking soda reaction is vigorous and can easily cause a boilover if your pot is too small, creating a huge, sticky mess.
Serving Suggestions
The possibilities are endless! Drizzle warm cajeta over vanilla bean ice cream, brownies, or apple slices. Swirl it into your morning coffee for a decadent treat, or spread it on warm toast, crêpes, or pancakes. It’s a heavenly dip for churros and fresh fruit, and can be used as a filling for cakes and pastries. For a savory twist, try a tiny drizzle over goat cheese on a cracker.
Storage and Reheating Tips
Store the cooled cajeta in a clean, airtight glass jar in the refrigerator. It will thicken considerably when chilled. It will keep well for up to one month. To use, you can let it sit at room temperature for a bit to soften, or gently warm it in the microwave in short bursts or in a small saucepan over low heat until it reaches your desired consistency.
Nutrition Facts (Estimated)
| Serving Size | 2 tablespoons |
| Calories | 115 kcal |
| Fat | 3.5 g |
| Saturated Fat | 2 g |
| Unsaturated Fat | 1.5 g |
| Trans Fat | 0 g |
| Cholesterol | 10 mg |
| Sodium | 55 mg |
| Carbohydrates | 18 g |
| Fiber | 0 g |
| Sugar | 17 g |
| Protein | 3 g |
Frequently Asked Questions
Why do you use goat’s milk for cajeta?
Goat’s milk is the traditional ingredient and the star of the show! It has a different protein and fat composition than cow’s milk, which gives cajeta its signature silky texture and a subtle, pleasant tanginess that balances the sweetness and adds incredible depth of flavor.
My cajeta looks grainy or curdled. What went wrong?
This can happen if the milk was heated too quickly or if the baking soda wasn’t incorporated properly. The baking soda helps to stabilize the milk proteins, but a rapid temperature change can still cause them to separate. To fix it, you can often whisk it vigorously while it’s still warm, or even carefully use an immersion blender for a few seconds to smooth it out.
Can I double this recipe?
Yes, you can double the recipe, but be aware that it will significantly increase the cooking time. You will also need a very large pot (at least 8 quarts) to accommodate the volume and the initial foaming. Expect the cooking time to be closer to 3 hours or more.
Is cajeta the same as dulce de leche?
They are very similar but distinct! Both are caramelized milk sauces. The key difference is that traditional cajeta is made with goat’s milk, while dulce de leche is made with cow’s milk. This gives cajeta a slightly tangier, more complex flavor profile.
Conclusion
There is something so satisfying about making this liquid gold from scratch. The way your kitchen fills with the sweet, toasty aroma is a reward in itself! Once you’ve tasted the deep, complex flavor of homemade cajeta, you’ll never go back to store-bought caramel again. If you make this recipe, I’d be thrilled to see it! Please tag me in your photos and share your creation on Pinterest – I can’t wait to see how you use it!