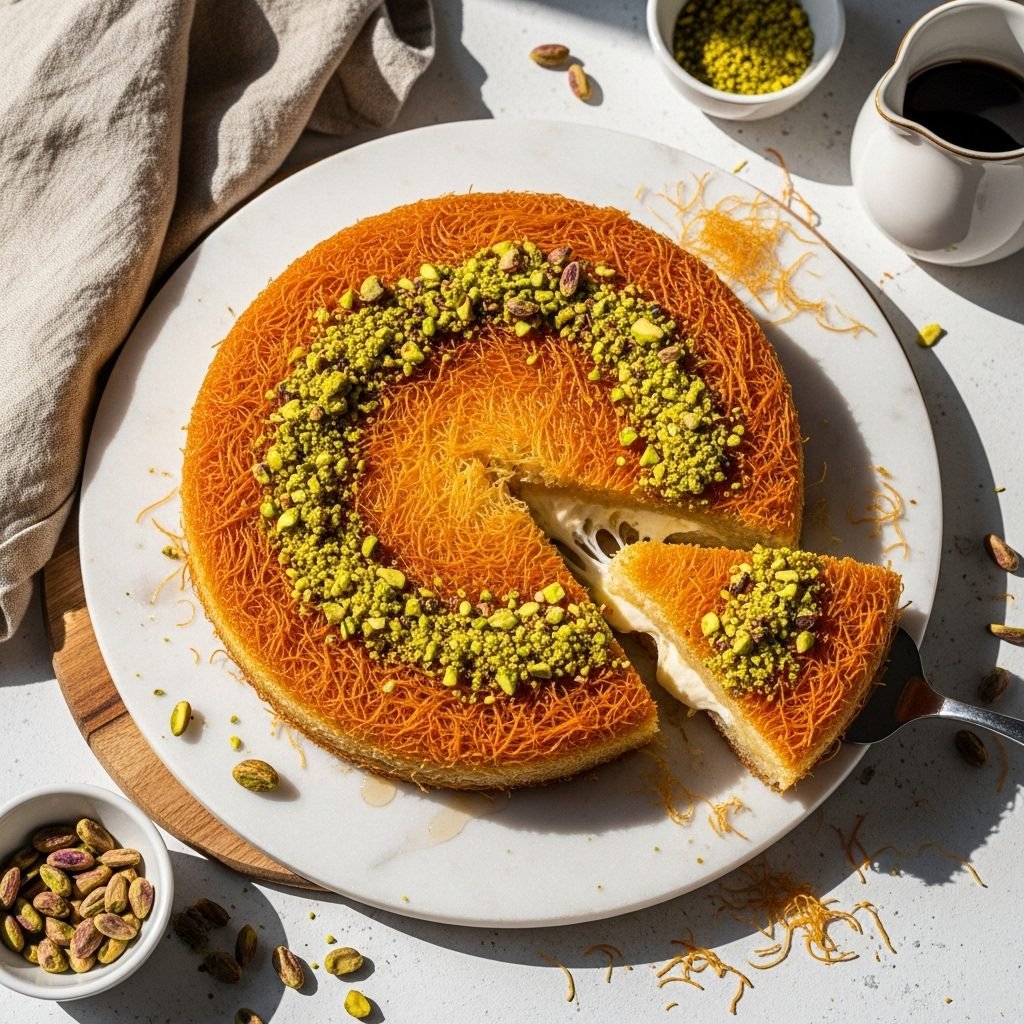
Golden, Gooey Kunafa That Brings Middle Eastern Dessert Magic Home
There’s something unforgettable about the first bite of warm kunafa—the crisp, buttery shredded pastry on the outside and the gooey, stretchy cheese or cream filling inside. It’s rich, fragrant, slightly sticky, and sweet in a way that feels comforting rather than overwhelming. If you’ve ever enjoyed kunafa at a bakery or during a celebration and wished you could recreate that moment at home, you’re in for a treat.
This homemade kunafa recipe is approachable, cozy, and wonderfully rewarding. You don’t need special equipment, and with just a few simple steps, you can create a dessert that looks gorgeous and tastes like something straight out of a Middle Eastern pastry shop.
Why You’ll Love This Kunafa
Kunafa has a little bit of everything—crunch, creaminess, warmth, and that lovely aromatic touch from rosewater or orange blossom. The contrast of textures makes every bite exciting. And because it’s made in a classic skillet or round pan, it feels rustic and homey while still being beautiful enough to serve to guests.
Highlights
- Flavor: Sweet, buttery pastry with a lightly floral syrup
- Texture: Crispy kataifi on the outside and soft, melty filling inside
- Time: About 1 hour total
- Difficulty: Easy to moderate
- What Makes It Special: A Middle Eastern dessert with incredible texture and a glowing golden color
Ingredients
Pastry Layer
- 1 lb kataifi (shredded phyllo dough), thawed
- 1 cup unsalted butter, melted
Filling Options
Cheese Filling:
- 2 cups low-moisture mozzarella, shredded
- 1 cup ricotta or unsalted cheese spread
- 1 tbsp sugar
Cream Filling:
- 2 cups heavy cream
- 2 tbsp cornstarch
- 2 tbsp sugar
- 1 tsp vanilla extract
Sugar Syrup
- 1 cup granulated sugar
- 1/2 cup water
- 1 tsp lemon juice
- 1–2 tsp rosewater or orange blossom water (optional)
Garnish
- Chopped pistachios
Step-by-Step Instructions
- Prepare the syrup: In a small pot, combine sugar and water. Bring to a simmer and cook 5–6 minutes until slightly thickened. Add lemon juice and floral water. Cool completely.
- Prepare the kataifi: Using your hands, gently separate the strands of kataifi so they’re light and fluffy. Pour melted butter over and work it in evenly.
- Prepare the filling: For cheese filling, mix mozzarella, ricotta, and sugar. For cream filling, heat cream with cornstarch and sugar until thick, then stir in vanilla.
- Preheat oven to 375°F.
- Assemble: Press half the buttered kataifi into the bottom of a greased 12-inch round pan, creating an even layer.
- Spread your filling evenly over the top.
- Cover with the remaining kataifi, pressing gently.
- Bake: Bake 30–35 minutes until the top is golden and crisp.
- Immediately pour cooled syrup evenly over the hot kunafa.
- Garnish with pistachios and let rest 10 minutes before slicing.
Helpful Cooking Tips
- Always pour cool syrup over hot kunafa to keep it crisp.
- Don’t skip separating the kataifi strands—it ensures even baking.
- Use less syrup if you prefer a less sweet dessert.
- For stretchier cheese, add a little shredded provolone.
- Keep the cream filling thick so it doesn’t spill when slicing.
Ingredient Substitutions & Dietary Options
- Butter: Ghee adds a deeper flavor; dairy-free butter works too.
- Cheese: Mix mozzarella with ricotta, mascarpone, or farmer’s cheese.
- Floral water: Use vanilla if you prefer neutral flavor.
- Syrup: Swap in honey for a stronger aroma.
- Kataifi: If unavailable, use thinly shredded phyllo cut into strips.
Common Mistakes to Avoid
- Using hot syrup: It can make the pastry soggy.
- Underbaking: The top should be deeply golden.
- Not draining ricotta: Excess liquid can make the center wet.
- Skipping butter distribution: Dry spots won’t crisp properly.
Serving Suggestions
- Serve warm with tea, coffee, or mint tea.
- Add berries or a scoop of vanilla ice cream.
- Drizzle with extra syrup right before serving.
- Serve wedges on small gold or ceramic plates for a festive touch.
Storage & Reheating Tips
- Room temperature: Keep up to 1 day.
- Refrigerate: Store up to 4 days.
- Freezing: Freeze before baking for up to 2 months.
- Reheating: Warm slices at 325°F for 10 minutes to restore crispness.
FAQ
Can I make kunafa ahead?
Yes—assemble and refrigerate overnight. Bake when ready.
What filling is traditional?
Cheese kunafa is most traditional, but cream versions are also popular.
Why is my kunafa not crispy?
It may have been over-syruped or not baked long enough.
Can I make mini kunafas?
Absolutely—bake in muffin tins for individual portions.
Final Thoughts
Kunafa is one of those desserts that feels celebratory but is surprisingly simple to make at home. The golden pastry, the creamy center, and that lightly floral syrup all come together to create something warm, inviting, and unforgettable.
Quick Summary
A crisp, golden shredded pastry filled with melty cheese or cream and soaked in sweet floral syrup—kunafa is a stunning Middle Eastern dessert you can easily recreate at home.
If you try this recipe, feel free to share a photo on Pinterest or tag it on social media. Desserts with this kind of glow deserve a spotlight.