Classic Linzer Torte Recipe That Tastes Like a European Bakery Favorite
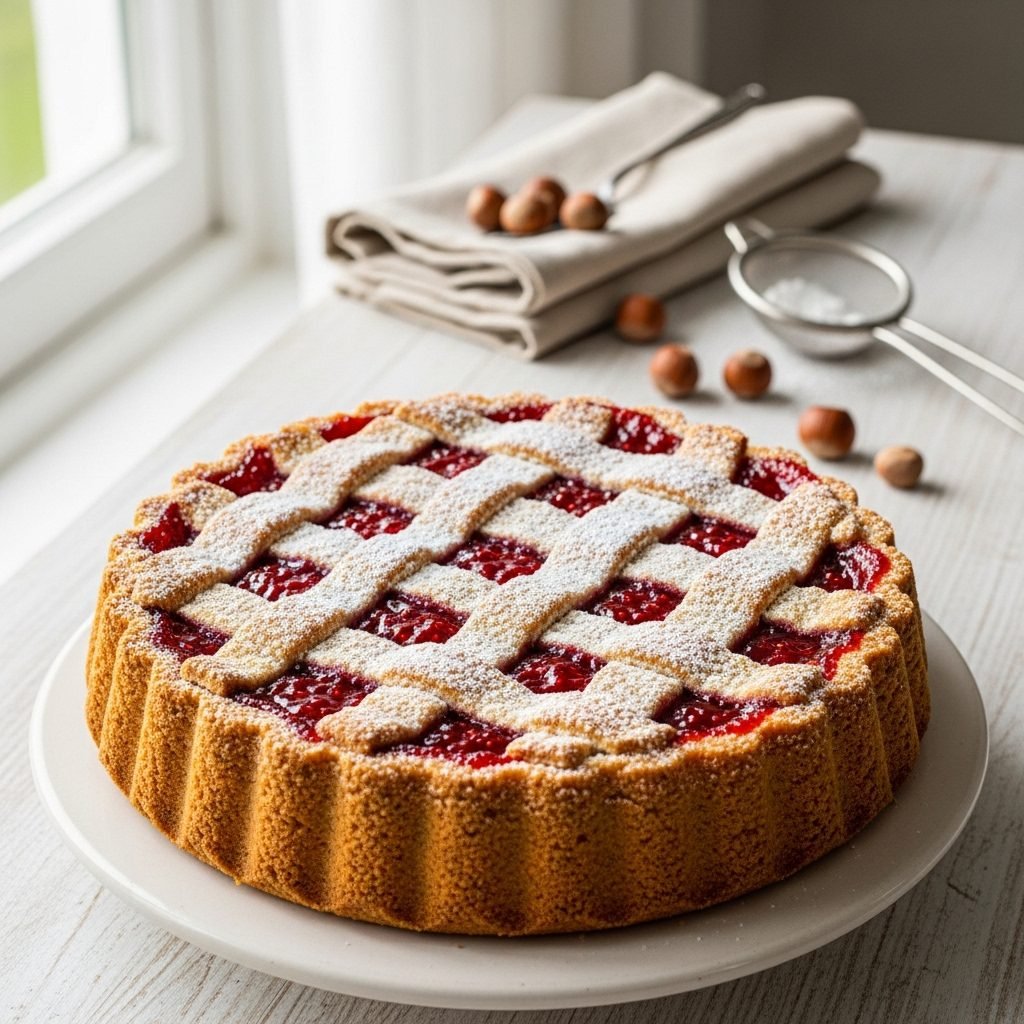
If you’ve ever walked past a bakery window during the holidays and seen that stunning, jam-filled dessert with the beautiful lattice top, you were probably looking at a Linzer Torte. It’s one of those classic European desserts that looks incredibly fancy, but I’m going to let you in on a little secret: it’s surprisingly straightforward to make at home.
This torte is the best of all worlds—it’s part-tart, part-pie, and has the rich, buttery soul of a cookie. It’s the kind of dessert that makes your whole house smell incredible. We’re talking toasted nuts, warm cinnamon and clove, bright lemon, and rich butter.
What I love most is the contrast. You get that rich, tender, crumbly crust that just melts in your mouth, and then—bam!—a bright, sweet-tart pop from a thick layer of raspberry jam.
This is the recipe I pull out for holiday gatherings, special-occasion brunches, or just a cozy weekend when I want to bake something that feels a little extra special. It’s a true showstopper, and I’ll walk you through every single step to make sure yours comes out beautifully.
Why You’ll Fall for This Recipe
This torte isn’t just a pretty face; it’s a flavor powerhouse. Here’s what’s waiting for you:
- The Flavor: The crust is the star. It’s nutty, deeply spiced with cinnamon and clove, and has a bright hint of lemon zest that cuts through the richness. It’s the perfect partner for the fruity, vibrant raspberry jam.
- The Texture: Get ready for a “sandy,” tender, melt-in-your-mouth experience. Because we use ground nuts in the dough, it’s not a chewy crust but a delicate, crumbly shortbread.
- The Time: This isn’t a 30-minute dessert. You’ll need about 45 minutes of active prep time, but the dough must chill for at least 2 hours. This is the most important step, so plan ahead! The bake itself is about 40-45 minutes.
- The “Wow” Factor: This torte looks like it came from a professional pastry shop. The lattice top is so striking, and the dusting of powdered sugar is the perfect finishing touch. It’s a “confident beginner” recipe—the steps are simple, but you need to follow the chilling-dough rules.
What You’ll Need for Your Torte
This recipe uses simple pantry staples to create something really special. I’ve broken it down into the two main parts: the crust and the filling.
For the Hazelnut Crust:
- 1 cup whole, raw hazelnuts (or you can use 1 cup slivered almonds)
- 2 cups all-purpose flour
- 3/4 cup granulated sugar
- 1 tsp ground cinnamon
- 1/4 tsp ground cloves (Don’t skip this! It adds that classic Linzer warmth)
- 1/2 tsp salt
- 1 tsp finely grated lemon zest
- 1 cup (2 sticks) cold, unsalted butter, cut into 1/2-inch cubes
- 2 large egg yolks (Save the whites for another use!)
- 1 tsp vanilla extract
For the Filling & Assembly:
- 1 (12-oz) jar of good-quality, thick raspberry jam (or black currant preserves)
- 1 large egg, lightly beaten with 1 tbsp water (for an egg wash)
- 1/4 cup powdered sugar, for dusting
A Note on the Jam: The type of jam you use matters. Look for “preserves” or a thick “fruit spread.” A runny, jelly-style jam will bubble over and can make the bottom crust soggy. If your jam feels thin, you can gently simmer it in a small saucepan for 5-10 minutes to thicken it up, then let it cool completely.
How to Make Your Linzer Torte, Step by Step
Ready? Let’s bake. The most important virtue here is patience. Cold dough is your best friend.
Step 1: Toast and Grind the Nuts
First, preheat your oven to 350°F. Spread the raw hazelnuts on a baking sheet and toast for 10-12 minutes, or until they are fragrant and the skins are starting to crack.
Let them cool for a few minutes. To remove the skins, wrap the warm nuts in a clean kitchen towel and rub them vigorously. The skins should flake right off. It’s okay if a few stubborn bits remain.
Once they’re cool, place the toasted, skinned nuts in a food processor. Pulse until they are very finely ground, about the texture of coarse cornmeal. Be careful not to over-process, or you’ll end up with hazelnut butter!
Step 2: Make the Dough
In the same food processor bowl (no need to clean it), add the all-purpose flour, granulated sugar, cinnamon, cloves, salt, and lemon zest. Pulse a few times to combine everything.
Add the cold, cubed butter and pulse 10-15 times, until the butter is broken down into small, pea-sized pieces.
In a small bowl, whisk together the egg yolks and vanilla extract. Add this mixture to the food processor and pulse just until the dough starts to clump together. It will still look crumbly, and that’s exactly what you want. Do not over-mix!
Step 3: Chill the Dough (The Most Important Step!)
Turn the crumbly dough out onto a clean, lightly floured surface. Gently knead it just 2 or 3 times—only until it forms a cohesive ball. This dough is very short (high in fat), so it will be tender.
Divide the dough into two pieces: one that’s about 2/3 of the total, and one that’s 1/3. Form each piece into a flat disc, wrap it tightly in plastic wrap, and refrigerate for at least 2 hours, or up to 2 days. This step is not optional! Chilling the dough solidifies the butter and hydrates the flour, which is essential for a tender crust that’s easy to roll out.
Step 4: Prepare the Torte Base
Once the dough is fully chilled, preheat your oven to 375°F.
Take the larger (2/3) disc of dough from the refrigerator. Let it sit on the counter for 5-10 minutes if it’s rock-hard. On a well-floured piece of parchment paper, roll the dough out into a circle that’s about 11-12 inches in diameter.
Carefully lift the parchment paper and invert the dough into a 9-inch round tart pan with a removable bottom. Gently peel off the parchment. Press the dough into the bottom and up the sides of the pan. If the dough cracks or breaks, don’t panic! This dough is very forgiving. Just patch any holes with your fingers. Trim the excess dough so it’s flush with the rim of the pan.
Step 5: Fill the Torte
Spread the raspberry jam in an even layer over the bottom of the crust, leaving about a 1/4-inch border around the edge.
Step 6: Create the Lattice Top
Now, take the smaller (1/3) disc of dough from the fridge. On a well-floured surface, roll it out into a rectangle about 1/4-inch thick.
Using a pizza cutter or a small knife, cut the dough into 10-12 long strips, each about 1/2-inch wide.
Carefully lay 5 or 6 strips horizontally across the jam-filled torte, spacing them evenly. Then, lay the remaining 5 or 6 strips diagonally (or vertically) over the first set to create a lattice pattern. Don’t worry about “weaving” them—a simple grid is traditional and beautiful. Gently press the ends of the strips into the torte’s edge to seal.
Brush the lattice strips (not the jam) with the beaten egg wash. This will give them a beautiful, glossy, golden-brown finish.
Step 7: Bake to Golden
Place the tart pan on a baking sheet (this catches any potential jam bubbles) and bake at 375°F for 40-45 minutes. The torte is done when the crust is a deep golden brown and the jam is bubbling vigorously around the edges.
Step 8: Cool and Dust
Let the torte cool in the pan on a wire rack for at least 15-20 minutes. Then, carefully remove the outer ring of the tart pan. Let the torte cool completely to room temperature. This is another crucial step! Cutting it warm will be a crumbly, messy affair.
Just before serving, dust the entire torte generously with powdered sugar.
My Top Tips for a Flawless Torte
- Cold, Cold, Cold: I know I’ve said it, but I’ll say it again. Your butter, your eggs, and your finished dough must be cold. If at any point the dough becomes sticky or soft while you’re rolling it, just pop it back in the fridge (or even the freezer) for 10 minutes.
- The “Pat-in” Method: If you’re struggling to roll out the bottom crust, don’t worry. You can simply crumble the chilled dough directly into the tart pan and press it in evenly with your fingers and the flat bottom of a measuring cup. It works just as well.
- Lattice Shortcuts: A small, fluted pastry wheel makes the lattice strips look extra professional. A simple ruler can help you keep your strips straight and even.
- Let It Rest: This torte is honestly better the day after it’s made. The jam has time to soften the crust slightly, and the flavors meld together beautifully. It’s the perfect make-ahead dessert.
Ingredient Swaps and Variations
- The Nuts: Hazelnuts are classic, but toasted almonds are just as traditional and delicious. You can also use walnuts for a richer, more earthy flavor. To save time, you can buy 1 cup of pre-ground hazelnut meal or almond flour.
- The Jam: Don’t love raspberry? Apricot and black currant are also very traditional. A tart cherry or fig jam would also be wonderful.
- The Spices: Feel free to add 1/4 teaspoon of cardamom or allspice to the dry ingredients for an even more complex, spicy aroma.
- Gluten-Free Linzer Torte: This recipe works very well with a high-quality 1-to-1 gluten-free all-purpose baking blend. Since the crust is already a short, crumbly style, the texture holds up beautifully.
- Nut-Free Linzer Torte: This is a bit tricky, as the nuts are a key component. You can substitute the 1 cup of ground nuts with an additional 1 cup of all-purpose flour, but the texture and flavor will be different. I’d also recommend adding 1/2 teaspoon of almond extract to the egg yolks to add back some nutty flavor.
Common Pitfalls (and How to Avoid Them)
- Overworking the Dough: If you mix the dough until it’s a smooth, elastic ball, you’ve gone too far. This activates the gluten and will result in a tough, chewy crust instead of a tender, crumbly one. Mix just until the crumbs come together.
- Skipping the Chill: I see a pattern here, don’t I? If you don’t chill the dough, the butter will melt, and you’ll have a greasy, sticky, impossible-to-roll-out mess.
- Cutting the Torte While Warm: All your hard work will be for nothing! The hot jam and tender crust will collapse. It must be at room temperature (or even chilled) to get those clean, beautiful slices.
How to Serve This Beauty
The torte is stunning all on its own, with its snowy dusting of powdered sugar. It’s traditionally served in thin wedges at room temperature. It’s rich, so a small slice goes a long way.
It doesn’t need much, but if you’re feeling indulgent, a dollop of unsweetened whipped cream or a very small scoop of vanilla bean ice cream is a lovely counterpoint to the sweet jam and rich crust. It’s the perfect dessert to serve with a strong cup of coffee or a hot cup of tea.
Storing Your Linzer Torte
This is one of my favorite desserts for storing because its flavor just gets better.
- Room Temperature: The torte is best stored at room temperature, lightly covered with plastic wrap or in an airtight container. It will keep for 3-4 days.
- Refrigerating: I don’t recommend refrigerating the finished torte, as it can make the crust go a bit soft.
- Freezing: You can freeze the fully baked and cooled torte. Wrap it tightly in plastic wrap, then a layer of aluminum foil. It will keep for up to 3 months. Let it thaw at room temperature before serving. You can also freeze the unbaked dough discs for up to 3 months.
Your Linzer Torte Questions, Answered
Do I have to use a tart pan? A tart pan with a removable bottom makes for the prettiest presentation and easiest removal. But you can absolutely make this in a 9-inch springform pan or even a regular 9-inch pie plate. The edges just won’t be as sharp.
Why is my dough so crumbly? It’s supposed to be! This is a “short” crust, which means it has a high ratio of fat (butter) to flour. This is what gives you that melt-in-your-mouth texture. If it’s too crumbly to form a ball, add a tiny splash (1/2 tsp) of ice water. If it’s crumbly after chilling, let it sit at room temp for 5-10 minutes to become more pliable.
My lattice strips broke! What do I do? Don’t worry! This dough is delicate. Just patch them back together. Gently press the broken ends together on top of the jam. It’s a rustic dessert, and once it’s baked and dusted with powdered sugar, no one will ever know.
Give It a Try—You’ve Got This!
Making a Linzer Torte is a wonderful way to spend an afternoon. It’s one of those bakes that feels like a project in the best way possible. The aroma of those spices and toasted nuts filling your kitchen is truly one of the coziest, most comforting smells.
I really hope you give this recipe a try. It’s a rustic, elegant dessert that feels both humble and incredibly sophisticated at the same time. When you make it, I hope it makes you feel like a star baker!
A Quick Summary
This classic Linzer Torte recipe guides you through creating a show-stopping dessert featuring a rich, crumbly crust made with toasted hazelnuts, warm spices, and bright lemon zest. The torte is filled with a generous layer of sweet-tart raspberry jam and topped with a beautiful, rustic lattice, making it a perfect centerpiece for any holiday or special occasion.
If you make this Linzer Torte recipe, I would be so happy to see it! Please tag me on [Your Social Media Handle] or share a photo. And if you loved it, please share this post on Pinterest! It’s a huge help and lets others discover the recipe, too. Happy baking!