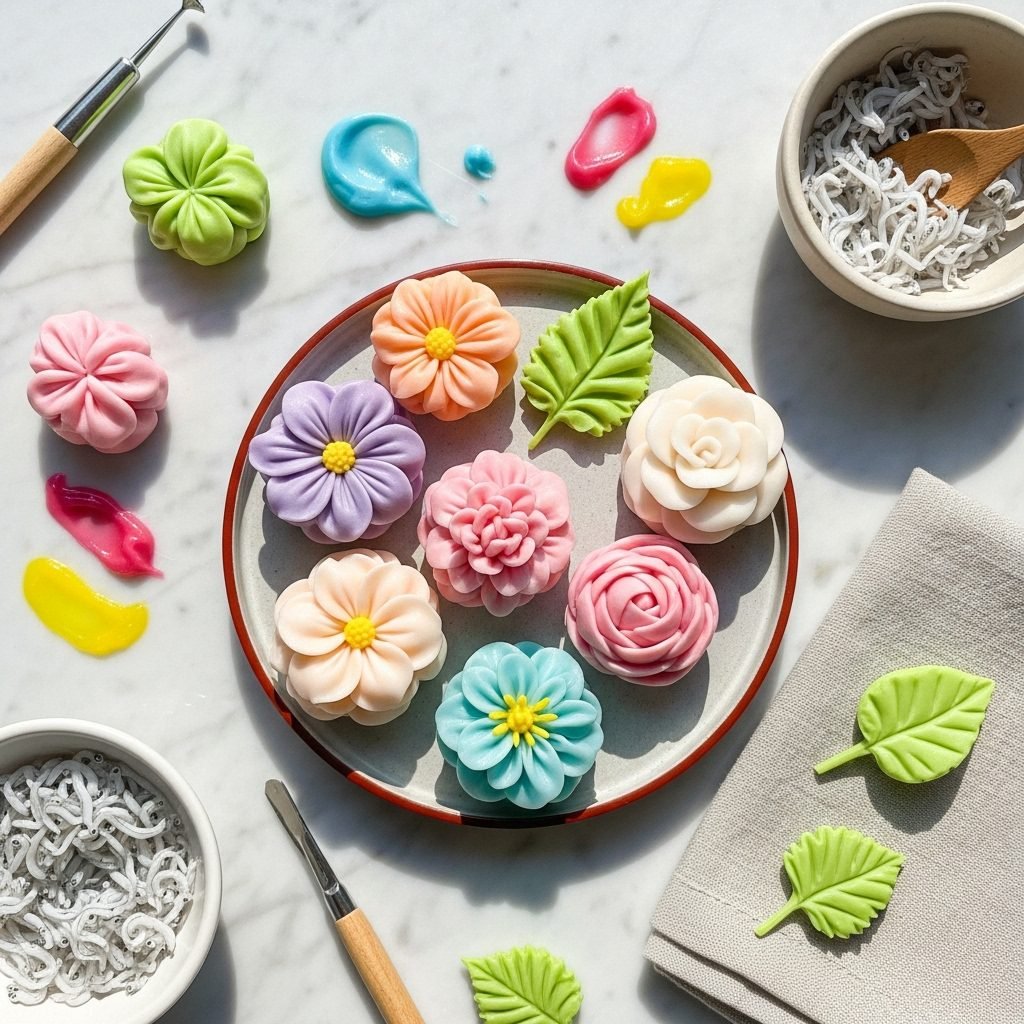
Delicate Nerikiri Sweets You Can Shape Into Anything
Nerikiri is one of those desserts that feels like a quiet art form. Soft, smooth, and gently sweet, it’s a Japanese wagashi traditionally shaped into tiny seasonal designs—flowers, leaves, fruit, and anything else your imagination leans toward. If you’ve ever admired those pastel, sculpted sweets in Japanese tea houses, this recipe brings that experience right into your own kitchen.
Why You’ll Love Making Nerikiri
There’s something soothing about kneading warm bean paste, tinting it with soft colors, and shaping it in your hands. The texture is almost velvety, the sweetness is subtle, and the process is surprisingly beginner-friendly once you get the feel of the dough. Even if you’re new to wagashi, nerikiri is a beautiful place to start.
Quick Highlights
- Taste: Mild, sweet, and clean with a smooth finish
- Texture: Soft, pliable, and silky, almost like edible modeling clay
- Time: About 60–75 minutes
- Difficulty: Beginner-friendly
- What Makes It Special: You can shape it into anything—flowers, fruits, little seasonal sculptures
Ingredients
For the nerikiri dough:
- 1 cup shiro-an (white bean paste)
- 1/2 cup glutinous rice flour
- 2 tbsp sugar
- 2 tbsp water (plus extra as needed)
For coloring & shaping:
- Gel food coloring (red, yellow, green, or your choice)
- Small sculpting tools or toothpicks
- Plastic wrap
Optional filling:
- 1/2 cup sweet red bean paste (anko), divided into small balls
Step-by-Step Instructions
- Prepare the dough base. Add shiro-an, glutinous rice flour, sugar, and 2 tbsp water to a nonstick pan. Stir well before turning on the heat.
- Cook gently. Heat over low, stirring continuously. The mixture will gradually thicken and come together as a soft dough.
- Stop when it firms slightly. Once the dough pulls away from the pan and feels similar to warm playdough, remove it from heat.
- Cool and knead. Let it cool until warm, then knead until smooth.
- Divide and color. Portion the dough into 4–6 smaller balls. Add a tiny dab of gel coloring to each and knead until evenly tinted.
- Shape the nerikiri.
- For filled versions: flatten a piece, place a small ball of anko inside, and wrap it like a dumpling.
- For unfilled versions: shape directly.
- Create designs. Use toothpicks, small sculpting tools, or simply your fingers to form petals, leaves, blossoms, or any seasonal shapes.
- Cover until serving. Place the finished nerikiri under plastic wrap to keep it from drying.
Helpful Cooking Tips
- A light touch of oil on your hands can help prevent sticking.
- Use very small amounts of food coloring—nerikiri should look soft and pastel.
- If the dough cracks while shaping, knead in a tiny bit of water.
- Warm dough molds beautifully; cold dough becomes firm.
- Don’t aim for identical shapes—nerikiri is all about organic, handmade charm.
Ingredient Substitutions & Dietary Options
- Shiro-an alternative: You can use white sweet potato paste blended with sugar, though the flavor is slightly earthier.
- Glutinous rice flour: Swap with regular mochiko if needed.
- Food coloring: Powdered natural colorants like matcha, beet powder, or butterfly pea powder work nicely.
- Vegan-friendly: This recipe is vegan.
- Gluten-free: All ingredients are naturally gluten-free.
Common Mistakes to Avoid
- Overheating the dough: High heat causes dryness and cracks.
- Adding too much food coloring: A little goes a long way; bold colors can look harsh.
- Skipping the kneading step: Kneading creates a smooth, workable texture.
- Letting the dough sit uncovered: It dries quickly—always keep it wrapped.
Serving Suggestions
- Serve with hot matcha or delicate green tea.
- Shape them according to the season—cherry blossoms for spring, maple leaves for fall.
- Arrange on a small ceramic plate with a tiny wooden pick.
- Pair with fresh fruit for color contrast.
Storage & Reheating Tips
- Room temperature: Store under plastic wrap and eat within 24 hours.
- Refrigeration: Can be stored for 1–2 days, but the texture becomes firmer.
- Freezing: Not recommended—the dough becomes grainy.
- Reheating: No reheating needed; simply let refrigerated pieces warm slightly.
FAQ
Is nerikiri edible or just decorative? It’s definitely edible—soft, sweet, and traditionally enjoyed alongside tea.
Do I need special tools? No. Toothpicks, chopsticks, or the back of a butter knife are enough to create beautiful designs.
What designs are easiest for beginners? Simple blossoms, leaves, or round shapes with gentle color gradients.
Can I fill nerikiri with other flavors? Yes—fruit jams, matcha paste, or chestnut paste work nicely.
Final Thoughts
Making nerikiri feels a bit like a quiet moment of creativity in the kitchen. You’re sculpting tiny edible pieces of art, each one a little different and beautifully imperfect. It’s relaxing, rewarding, and perfect for those days when you want to slow down and create something special.
Quick Summary
Soft, hand-shaped wagashi made from sweet bean paste and glutinous rice flour, tinted with pastel shades and shaped into tiny seasonal designs. Elegant, calming, and delicious with tea.
If you enjoyed this recipe, share it on Pinterest or tag your creation on social media—I love seeing how others shape their nerikiri.