The Secret to Real French Fruit Jellies (Pâte de Fruits) You Can Make at Home
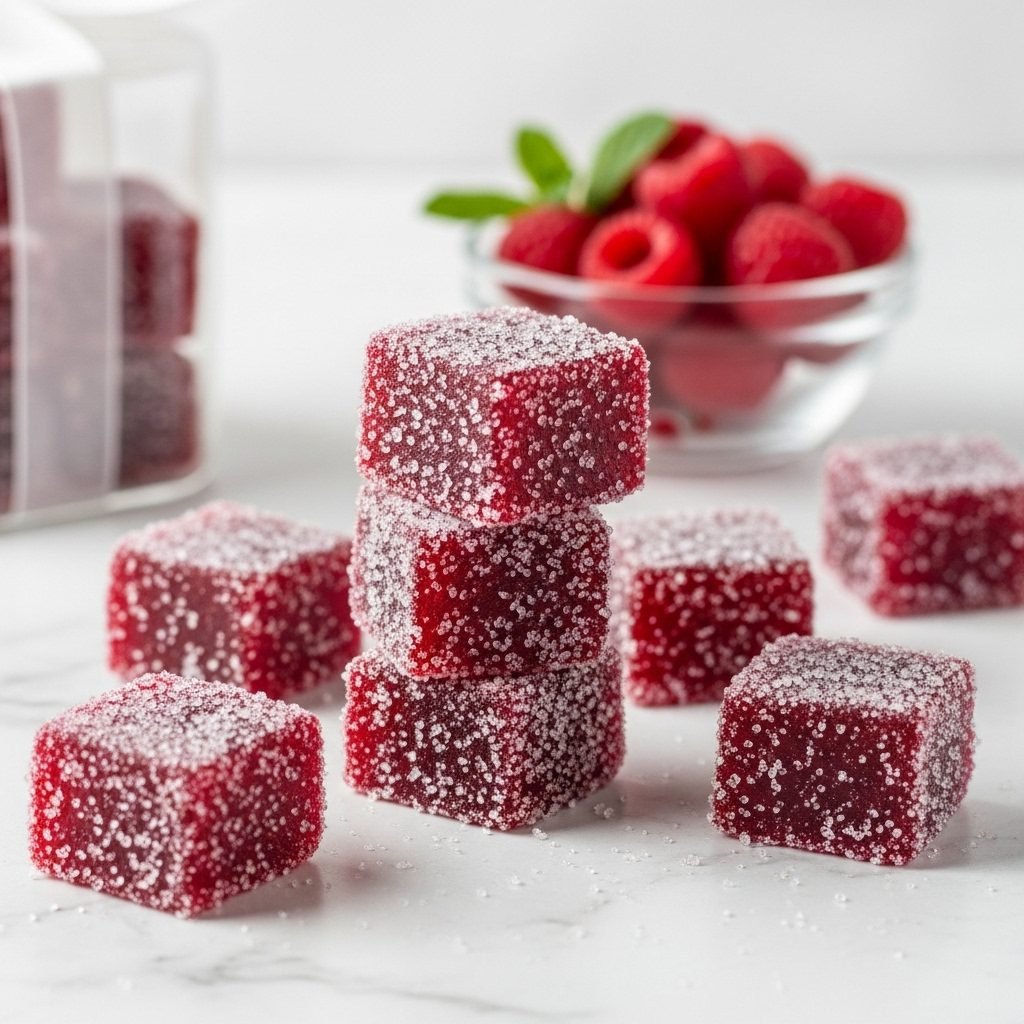
You know those perfect, jewel-like fruit squares you see in the windows of fancy French bakeries? The ones that look like stained glass, coated in sparkling sugar? That’s Pâte de Fruits (pronounced pat-duh-fwee), and they always seemed like one of those magical, “pastry-chefs-only” confections.
For years, I was too intimidated to try them. I assumed it involved some complicated candy-making voodoo that was destined to fail in a home kitchen.
But here’s the secret I learned: It’s not magic, it’s just a little bit of food science. And if you have a candy thermometer and the right kind of pectin, you can absolutely make them.
This recipe is my raspberry version. The flavor is so pure and intense, it’s like the essence of summer raspberries captured in a tiny, chewy square. They are so much brighter and more flavorful than any store-bought version I’ve ever had.
This is a “project” recipe, for sure. It’s not a 30-minute quickie. But it’s a wildly rewarding one. It’s perfect for a weekend, and the finished candies make the most beautiful, impressive homemade gift for the holidays, tucked into a little box.
So let’s break down the “scary” parts and make some beautiful French candy.
Why You’ll Adore This Recipe
- The Taste: Incredibly bright, vibrant, and packed with pure fruit flavor. The sweetness is balanced by a wonderful tartness from the raspberries.
- The Texture: This is the best part. They have a firm, “short” bite—not squishy like Jell-O or tough like a gummy bear. It’s a tender, melt-in-your-mouth jell that’s completely unique.
- The “Wow” Factor: They are just stunning. The deep ruby color is all-natural, and the sparkly sugar coating makes them look so professional.
- The Difficulty: I’d call this “Medium.” It’s not for a total beginner, only because it requires precision. You have to follow the steps exactly, and a candy thermometer is non-negotiable. But the steps themselves are simple!
- They are Naturally Vegan & Gluten-Free! Pectin is a plant-based gelling agent, so these are a treat almost anyone can enjoy.
What You’ll Need
Confectionery is like chemistry, so measurements are important. This recipe is specifically designed for yellow pectin, which is the secret to that classic Pâte de Fruits texture.
- 17.5 oz (about 2 cups) Seedless Raspberry Purée
- Note: This is about 1.5 lbs (or 24 oz) of fresh or frozen raspberries. Just blend them (thaw first if frozen) and then push the purée through a fine-mesh sieve to remove all the seeds. This step is a must.
- ¾ cup + 2 tbsp (6 oz) Granulated Sugar, divided
- 1.5 tbsp (0.4 oz) Yellow Pectin (also called Pectine Jaune)
- Note: This is NOT the same as regular jam pectin (like Sure-Jell) from the grocery store. It’s a high-methoxyl pectin designed for high-sugar jellies. You can easily find it online from brands like King Arthur or Modernist Pantry.
- 1 ¼ cups (8.8 oz) Granulated Sugar (the main portion)
- ⅓ cup (3.75 oz) Light Corn Syrup (or Glucose Syrup)
- Note: This is crucial. It’s an “invert sugar” that prevents the regular sugar from crystallizing, ensuring a smooth texture.
- 1 tsp Citric Acid
- 1 tsp Water
- ½ cup Granulated Sugar (for coating)
Equipment:
- A heavy-bottomed, medium saucepan (at least 3-4 quarts)
- A digital candy thermometer
- An 8×8 inch baking pan
- Parchment paper
- A whisk and a heat-safe spatula
Let’s Make Pâte de Fruits, Step-by-Step
This recipe moves very fast at the end, so the most important step is the first one: mise en place. Get everything measured and ready before you turn on the stove.
Part 1: Get Everything Ready
- Prep Your Pan: Lightly grease your 8×8 inch baking pan, then line it with parchment paper, making sure to leave some “overhang” on two sides to act as handles. Lightly grease the parchment paper itself. Set it right next to your stove.
- Prep the Pectin: In a small bowl, whisk together the ¾ cup + 2 tbsp (6 oz) of granulated sugar and the 1.5 tbsp (0.4 oz) of yellow pectin. Whisk them together thoroughly. This separates the pectin grains so they don’t clump up when they hit the liquid.
- Prep the Acid: In another tiny bowl, stir together the 1 tsp citric acid and 1 tsp water until the acid is fully dissolved. Set this near your stove.
- Measure Everything Else: Have your 1 ¼ cups (8.8 oz) main sugar and your ⅓ cup (3.75 oz) corn syrup measured and ready to go.
Part 2: Cook the Candy
- Start the Base: In your heavy-bottomed saucepan, combine the 17.5 oz (2 cups) of seedless raspberry purée and the corn syrup.
- Add Pectin-Sugar: Place the pan over medium heat and start whisking. When the purée is warm to the touch (about 115-120°F), slowly shower in the pectin-sugar mixture while whisking constantly. Continue whisking until the mixture comes to a full boil.
- Add Main Sugar: Once it’s boiling, add the 1 ¼ cups (8.8 oz) of main sugar in a slow, steady stream while whisking. Don’t dump it all in at once!
- The Cook: Bring the mixture back to a boil, stirring constantly. Now, switch from the whisk to your heat-safe spatula. Scrape the bottom and corners of the pot continuously to prevent scorching.
- Clip on Thermometer: Attach your candy thermometer to the side of the pot, making sure the tip is submerged in the mixture but not touching the bottom.
- Cook to 225°F: Continue cooking, stirring constantly, until the mixture reaches 225°F (107°C). This is the magic number for the set. This step takes patience—it can take 15-25 minutes. The mixture will get very thick, glossy, and sputter like slow-motion lava. Don’t walk away!
- Add the Acid: As soon as it hits 225°F, turn off the heat. Remove the pan from the burner.
- WORK FAST: Immediately pour in your dissolved citric acid solution and whisk it in very quickly and thoroughly. The mixture will seize up and thicken almost instantly.
Part 3: Set, Cut, and Cure
- Pour and Spread: Immediately pour the thick, hot mixture into your prepared 8×8 pan. It will be very thick. Use an offset spatula (or the back of a spoon) lightly greased with oil to spread it into an even layer.
- The First Cure (Setting): Let the pan sit, uncovered, at room temperature. Do NOT put it in the refrigerator. It needs to set and dry out. This will take at least 4 hours, but I find that leaving it overnight (8-12 hours) gives the best, firmest texture.
- De-Pan and Cut: The next day, your slab should be firm and easy to handle. Use the parchment paper “handles” to lift the entire slab out onto a cutting board.
- Oiled Knife: Lightly oil a large, sharp knife or a bench scraper. This is key to getting clean cuts. Cut the slab into 1-inch strips, then cut those strips into 1-inch squares. (You’ll get 64 squares).
- The Sugar Toss: Place your ½ cup of coating sugar in a bowl. Add the squares, a few at a time, and toss them gently to coat all sides.
- The Second Cure (Crusting): This is the final step for that professional finish. Place the sugared squares on a wire rack, not touching. Let them sit out, uncovered, for another 2-4 hours (or longer if your house is humid). This lets the sugar coating dry out and form a delicate crust.
My Top Tips for Success
- Mise en Place is Everything: I’m saying it again because it’s that important. Once you start cooking, you can’t stop to measure the acid or prep the pan. Have everything ready before you start.
- The Pectin Matters: Do not substitute regular jam pectin. It will not work. This recipe is balanced for yellow pectin.
- Stir Constantly (and Scrape!): Fruit purée and sugar love to scorch on the bottom of a pot. You must scrape the bottom and corners with a heat-safe spatula for the entire cooking time.
- Calibrate Your Thermometer: Before you start, test your thermometer in a pot of boiling water. It should read 212°F (100°C) at sea level. If it’s off by a few degrees, adjust your target temperature accordingly. (e.g., if it reads 210°F in boiling water, your target temp is 223°F).
- Work Fast at the End: The moment that acid hits the hot mixture, the gelling process begins. You have about 30-60 seconds to get it into the pan and spread it out before it becomes unmanageable.
Playing With Flavors & Ingredients
- Other Fruits: This recipe is a great template! You can swap the raspberry purée for other high-pectin, acidic fruits. Great choices include:
- Passion Fruit (use seedless purée)
- Apricot (use purée, not jam)
- Strawberry (sieve the seeds!)
- Blood Orange (use juice, but you may need to cook it a bit longer)
- Citric Acid Substitute: If you absolutely can’t find citric acid, you can use fresh lemon juice. Double the amount (so, 2 teaspoons of lemon juice) and add it at the same point (off the heat, at the very end). It’s slightly less reliable for a firm set but will work in a pinch.
- Can I use frozen fruit? Yes! In fact, it’s often better because it’s picked at peak ripeness. Just thaw the fruit completely before you blend and sieve it.
Where It Might Go Wrong (And How to Fix It)
- “My Pâte de Fruits didn’t set! It’s runny.”
- This is the most common issue and it’s almost always one of two things:
- 1. You didn’t cook it long enough. It must reach 225°F. Even 223°F can result in a soft, sticky set.
- 2. You used the wrong pectin. Regular pectin (like Sure-Jell or Certo) is not formulated for this.
- The Fix: Unfortunately… there isn’t a good one. You can’t just re-boil it. But now you have an incredible raspberry “jam” or sauce. It’s amazing on ice cream, yogurt, or as a cake filling!
- “My candy is sticky and ‘weeping’ sugar.”
- This happens for two reasons:
- 1. You didn’t let it “cure” long enough. Both the initial set and the final set on the wire rack are important for letting moisture evaporate.
- 2. Humidity. This is the great enemy of candy. Don’t try to make this on a rainy, humid day. If your house is humid, you may need to let them cure on the rack for a full day.
- “My pectin clumped up when I added it.”
- You must whisk the dry pectin with the dry sugar before adding it to the warm liquid. This is non-negotiable. If it clumps, you’ll have little hard bits in your final candy.
How to Serve and Store Your Candies
- Storage is Key: Store your finished, cured Pâte de Fruits in an airtight container at room temperature.
- DO NOT REFRIGERATE! The refrigerator is a humid environment, and it will cause the sugar coating to melt and the candies to get sticky and wet.
- Layer Them: Separate layers in your container with sheets of parchment or wax paper. They will last for 2-3 weeks at room temperature.
- Serving: These are a “one-bite” treat. They are perfect for:
- Building a holiday cookie box.
- Serving with after-dinner espresso.
- Gifting in a beautiful little box.
- Adding to a high-end cheese or charcuterie board (the tart fruit is a great contrast to rich cheeses).
Your Questions, Answered
Can I reduce the sugar in this recipe? Sadly, no. This is one recipe where the sugar is a critical structural element, not just for sweetness. The high sugar concentration is what works with the pectin to create the jell and also what makes them shelf-stable. It’s candy, after all!
My mixture is boiling, but the temperature won’t go up! This is normal! For a long time, the temperature will “stall” around 212-215°F as the water evaporates. You have to push past this point. Be patient, keep stirring, and the temperature will eventually start to climb to 225°F.
Can I double this recipe? I would not recommend it, especially for your first time. Candy recipes are sensitive to batch size. It will take much longer to reach 225°F, increasing the risk of scorching. It’s safer to make two separate batches.
A Little Bite of Patisserie
When you’re done, you’ll have a pile of these gorgeous, sparkling, ruby-red gems. The flavor is just so bright and clean. It’s a project that takes some time and attention, but the result is so worth it.
You just made one of the most elegant French confections in your own kitchen. How amazing is that?
Recipe Summary
Pâte de Fruits are elegant French fruit jelly candies with a pure, intense fruit flavor and a tender, melt-in-your-mouth texture. This recipe walks you through making a raspberry version from scratch. By using seedless fruit purée, the correct yellow pectin, and a candy thermometer to reach a precise 225°F, you can create these beautiful, shelf-stable confections at home. They are naturally vegan, gluten-free, and make a stunning homemade gift.