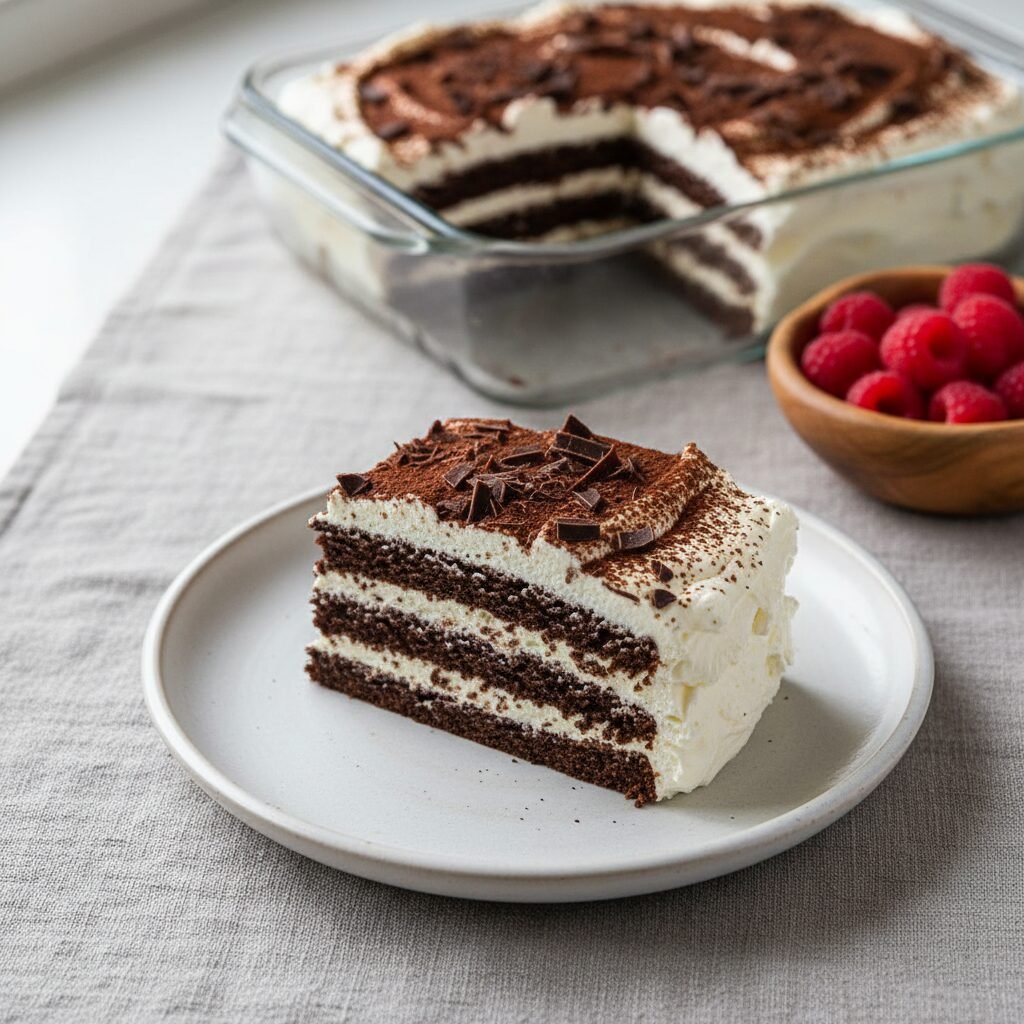
Effortless No-Bake Chocolate Ripple Icebox Cake
Refrigerator Cake Recipe
Get ready to fall in love with the easiest, most impressive dessert you’ll ever make! This No-Bake Chocolate Ripple Icebox Cake uses just four simple ingredients to create a stunning, creamy, cake-like dessert that tastes like a cookies-and-cream dream. It’s the perfect make-ahead treat for parties, potlucks, or any time you need a little magic without turning on the oven.
20 minutes
8 hours chilling
8 hours 20 minutes
8-10 servings
Dessert
No-Bake
American
N/A
Why You’ll Love This Recipe
- ✓Incredibly easy no-bake recipe
- ✓Only 4 simple ingredients required
- ✓Perfect make-ahead dessert for any occasion
- ✓Creamy, dreamy, cookies-and-cream flavor
Equipment You’ll Need
- ✓Electric hand mixer or stand mixer
- ✓Large mixing bowl
- ✓Rubber spatula
- ✓8×8 inch square baking pan or 9×5 inch loaf pan
- ✓Offset spatula (optional, for smooth spreading)
- ✓Plastic wrap
Ingredients
- ✓2 cups heavy whipping cream, very cold
- ✓1/3 cup powdered sugar
- ✓1 1/2 teaspoons pure vanilla extract
- ✓1 package (9 ounces) Nabisco Famous Chocolate Wafers (or similar thin chocolate cookies)
- ✓Optional Garnish: Chocolate shavings, cocoa powder, or fresh berries
Instructions
- First, prepare your pan. You can lightly grease it or line it with plastic wrap or parchment paper, leaving an overhang on the sides. This will make it much easier to lift the cake out for slicing later.
- In a large, chilled mixing bowl, pour in the very cold heavy whipping cream. Using an electric hand mixer or a stand mixer with the whisk attachment, beat the cream on medium speed until it begins to thicken.
- Once soft peaks start to form, gradually add the powdered sugar and the vanilla extract. Increase the speed to medium-high and continue to beat until stiff, billowy peaks form. You’ll know it’s ready when you can lift the beater out and the cream holds its shape without flopping over. Be careful not to overmix, or it will start to turn into butter!
- Spread a very thin layer of the whipped cream on the bottom of your prepared pan. This little bit of ‘glue’ helps the first layer of cookies stay in place.
- Arrange a single, tight layer of chocolate wafer cookies over the whipped cream, covering the entire bottom of the pan. You may need to break some cookies to fill in any gaps – don’t worry about it being perfect!
- Generously spread about one-quarter of the remaining whipped cream evenly over the cookie layer. Use a spatula to create a smooth, even surface, ensuring all the cookies are covered.
- Repeat the process, alternating between layers of chocolate wafers and layers of whipped cream. You should be able to create about 3-4 layers of cookies, depending on the size of your pan.
- Finish with a final, generous layer of whipped cream on top. Use an offset spatula to swirl it into a beautiful, fluffy pattern or smooth it out completely.
- Cover the pan tightly with plastic wrap, making sure the wrap doesn’t touch the surface of the cream. Transfer the cake to the refrigerator to chill for at least 8 hours, or preferably overnight. This chilling time is crucial – it’s when the cookies absorb the moisture from the cream and transform into a soft, cake-like texture.
- Once chilled and set, use the plastic wrap or parchment overhangs to lift the cake out of the pan. Garnish the top with chocolate shavings, a dusting of cocoa powder, or fresh berries right before serving. Slice with a sharp knife and serve immediately.
Expert Cooking Tips
- ✓For the fluffiest whipped cream, chill your mixing bowl and beaters in the freezer for about 15 minutes before you start. Cold cream and cold tools are the secret to success!
- ✓Don’t skimp on the chilling time! The magic of a refrigerator cake happens as it rests. Rushing this step will result in crunchy cookies instead of a soft, tender cake.
- ✓For extra clean slices, run a large, sharp knife under hot water and wipe it dry between each cut. This helps the knife glide through the layers without smearing the cream.
- ✓Feel free to get creative with the shape! You can also assemble this cake by standing the cookies on their sides in a loaf pan, sandwiching cream between each one to create a log shape. When you slice it on a diagonal, it reveals beautiful stripes.
Substitutions and Variations
This recipe is wonderfully adaptable! For a different flavor profile, try using gingersnaps, Biscoff cookies, or even thin shortbread cookies instead of chocolate wafers. You can also flavor the whipped cream by adding a teaspoon of instant espresso powder for a mocha twist, or a dash of peppermint extract for a holiday version. For a gluten-free option, simply use your favorite brand of thin, crispy gluten-free chocolate cookies.
Common Mistakes to Avoid
The most common mistake is not chilling the cake long enough. It needs a minimum of 8 hours for the cookies to fully soften and meld with the cream; overnight is even better. Another potential pitfall is under-whipping or over-whipping the cream. If it’s too soft (under-whipped), the cake will be soupy. If it’s grainy and separated (over-whipped), you’ve started making butter. Aim for firm, stable peaks that hold their shape perfectly.
Serving Suggestions
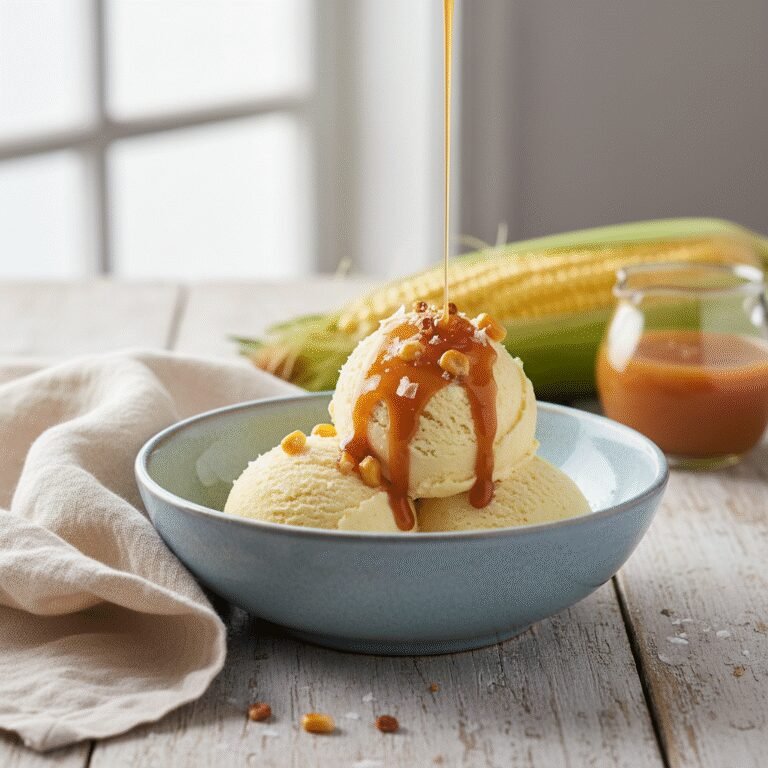
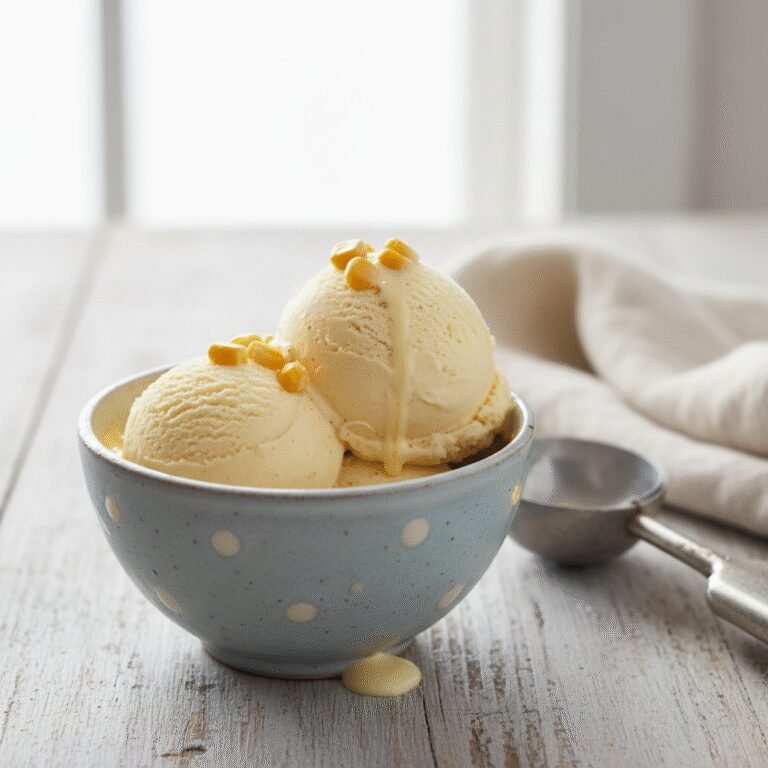
Serve this cake chilled, directly from the refrigerator for the best texture. It’s stunning on its own, but you can elevate it with a drizzle of hot fudge or salted caramel sauce. A side of fresh raspberries or sliced strawberries adds a wonderful, bright contrast to the rich chocolate flavor. For a truly decadent treat, serve a slice with a scoop of vanilla bean ice cream.
Storage and Reheating Tips
Keep any leftover refrigerator cake tightly covered with plastic wrap in the fridge. It will stay fresh for up to 3 days. Be aware that the cookies will continue to soften over time, so the texture will be best on days one and two. Freezing is generally not recommended as it can cause the whipped cream to separate and become watery upon thawing.
Nutrition Facts (Estimated)
| Serving Size | 1 slice |
| Calories | 385 kcal |
| Fat | 29 g |
| Saturated Fat | 18 g |
| Unsaturated Fat | 9 g |
| Trans Fat | 0 g |
| Cholesterol | 85 mg |
| Sodium | 240 mg |
| Carbohydrates | 31 g |
| Fiber | 2 g |
| Sugar | 26 g |
| Protein | 4 g |
Frequently Asked Questions
Can I use Cool Whip or another stabilized whipped topping instead of fresh whipped cream?
Yes, you can substitute an equal amount of thawed whipped topping like Cool Whip. It will be a bit sweeter and have a slightly different flavor, but it works well and is a great shortcut if you’re short on time.
My cake seems a bit runny. What went wrong?
This usually happens if the whipped cream wasn’t whipped to stiff peaks. The cream needs to be firm enough to support the layers. Make sure you beat it until it holds its shape firmly when you lift the beaters out.
I can’t find Nabisco Famous Chocolate Wafers. What else can I use?
If you can’t find them, any thin, crisp chocolate cookie will work. Look for chocolate graham crackers, Oreo Thins (scrape out the filling), or other simple chocolate biscuits. The key is for them to be thin and porous enough to absorb the cream.
Can I make this cake more than one day in advance?
You can assemble it up to 24 hours in advance, which is perfect for parties. Any longer than that and the cookies may become overly soft and lose their structure, but it will still be delicious!
Conclusion
And there you have it – a show-stopping dessert that requires zero baking and minimal effort. This Chocolate Ripple Icebox Cake is a timeless classic for a reason. It’s cool, creamy, and guaranteed to disappear in minutes. Give this recipe a try for your next get-together, and watch it become a new family favorite! If you make it, I’d love to see it! Snap a picture and tag me on social media, and don’t forget to pin this recipe for later.