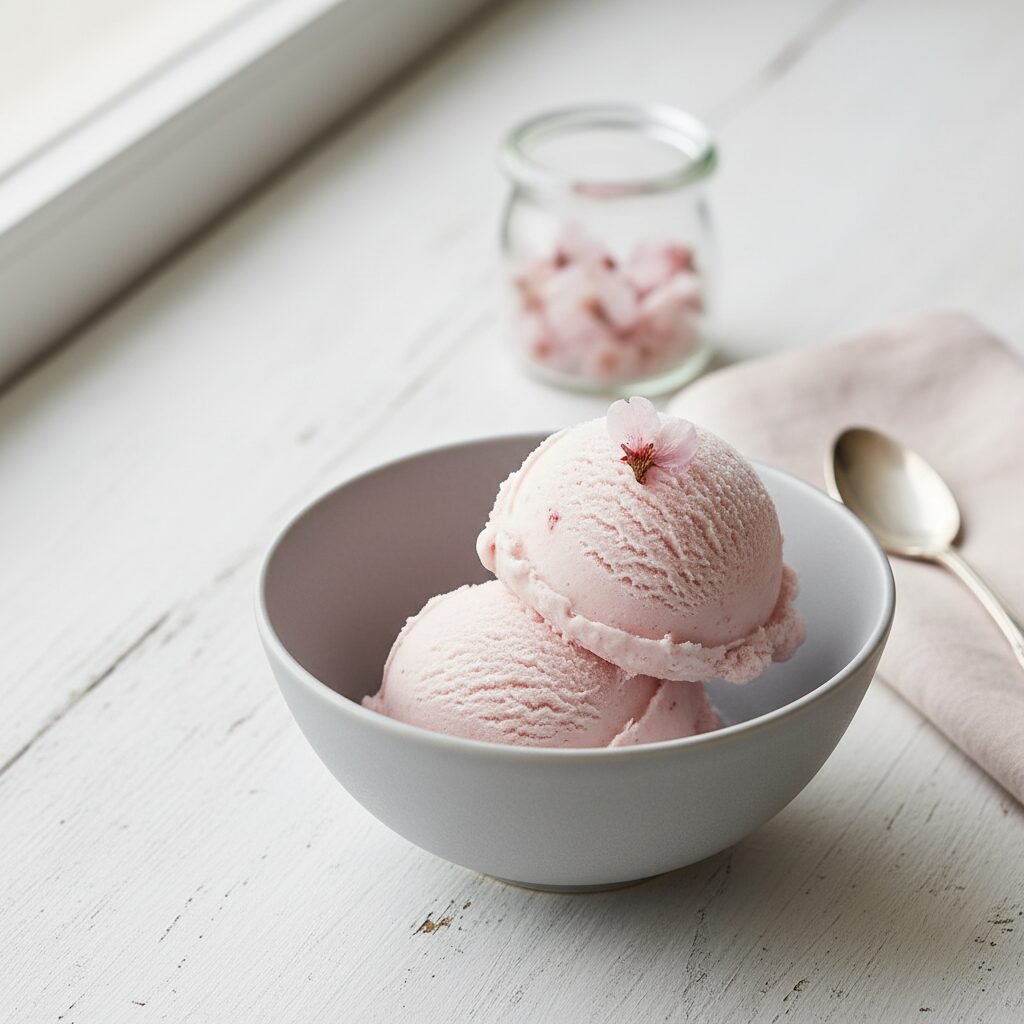
Ethereal Cherry Blossom Ice Cream (Homemade Sakura Flavor)
Sakura Ice Cream Recipe
Capture the fleeting beauty of spring in a scoop with this ethereal Sakura Cherry Blossom Ice Cream. This no-churn recipe transforms a few special ingredients into a creamy, dreamy dessert with a unique flavor that’s subtly floral, slightly savory, and unforgettable. It’s a taste of Japan in your own kitchen, and it’s surprisingly simple to create.
20 minutes (plus 1 hour soaking & 2 hours chilling)
10 minutes
9 hours 30 minutes (includes freezing time)
Makes 1 quart (8 servings)
Dessert
No-Churn
Japanese
N/A
Why You’ll Love This Recipe
- ✓Delicate, floral cherry blossom flavor with a hint of salt
- ✓Incredibly creamy no-churn recipe, no ice cream maker needed!
- ✓Stunning natural pale pink hue, perfect for spring
- ✓A unique and elegant dessert that will wow your guests
Equipment You’ll Need
- ✓Small bowl for soaking blossoms
- ✓Medium saucepan
- ✓Fine-mesh sieve
- ✓Large mixing bowl (preferably chilled)
- ✓Electric mixer (handheld or stand mixer)
- ✓Silicone spatula
- ✓1.5-quart loaf pan or other freezer-safe container
Ingredients
- ✓1/4 cup salt-preserved cherry blossoms (sakura-no-shiozuke)
- ✓1 cup whole milk
- ✓2 cups heavy whipping cream, very cold
- ✓1 (14-ounce) can sweetened condensed milk, chilled
- ✓1 teaspoon vanilla extract
- ✓1/8 teaspoon almond extract (optional, but enhances the cherry flavor)
- ✓1-2 drops pink or red food coloring (optional, for color)
Instructions
- First, prepare the cherry blossoms. Gently rinse the blossoms under cool water to remove excess salt. Place them in a small bowl and cover with fresh, cool water. Let them soak for at least 1 hour to rehydrate and draw out more salt. After soaking, drain them and gently pat dry with a paper towel. Reserve 8-10 of the prettiest blossoms for garnish and finely chop the rest.
- In a medium saucepan, combine the whole milk and the chopped cherry blossoms. Heat over medium-low heat until the milk is steaming and small bubbles form around the edges. Do not let it boil.
- Remove the saucepan from the heat, cover it, and let the blossoms steep in the warm milk for 30 minutes to infuse their delicate flavor.
- Pour the infused milk through a fine-mesh sieve into a clean bowl, pressing gently on the blossoms to extract all the liquid. Discard the chopped blossoms. Cover the sakura-infused milk and chill in the refrigerator for at least 2 hours, or until completely cold.
- In a large, chilled mixing bowl, pour in the very cold heavy whipping cream. Using an electric mixer, beat the cream on medium-high speed until stiff peaks form. This means when you lift the beaters, the cream stands up in a peak that holds its shape without flopping over.
- In a separate medium bowl, whisk together the chilled sweetened condensed milk, the chilled sakura-infused milk, vanilla extract, and almond extract (if using). Add a drop of pink food coloring if you desire a more pronounced pink color and whisk until evenly combined.
- Gently pour the condensed milk mixture into the whipped cream. Using a silicone spatula, carefully fold the two mixtures together until just combined. Be gentle to avoid deflating the whipped cream; some streaks are okay.
- Pour the ice cream base into your loaf pan or freezer-safe container and smooth the top. Delicately place the reserved whole cherry blossoms on top for decoration.
- Cover the container tightly. You can press a piece of parchment paper directly onto the surface of the ice cream to prevent ice crystals. Freeze for at least 6 hours, or until firm.
- Before serving, let the ice cream sit at room temperature for 5-10 minutes to soften slightly for easier scooping. Enjoy your homemade sakura treat!
Expert Cooking Tips
- ✓For the creamiest texture, make sure all your key ingredients and tools (heavy cream, condensed milk, mixing bowl, beaters) are thoroughly chilled before you start.
- ✓Don’t skip the soaking and rinsing step for the sakura blossoms. They are packed in a lot of salt for preservation, and failing to remove it will make your ice cream unpleasantly salty.
- ✓Taste your sakura-infused milk after it has steeped. If the flavor is too subtle, you can gently reheat it (don’t boil) and let it steep for another 15-20 minutes.
- ✓When folding the whipped cream into the condensed milk base, use a light hand. The goal is to maintain as much air in the whipped cream as possible for a light, non-icy final product.
Substitutions and Variations
If you cannot find salt-preserved cherry blossoms, you can try using 1 to 1.5 teaspoons of sakura powder or sakura extract, stirred into the milk (no heating necessary). For a dairy-free version, substitute the heavy cream with chilled, full-fat canned coconut cream (the thick part only) and use a can of sweetened condensed coconut milk. The flavor profile will have a coconut note but will still be delicious.
Common Mistakes to Avoid
The most common mistake is not rinsing the salted sakura blossoms enough, leading to an overly salty dessert. Taste a petal after soaking; it should have a pleasant, mild saltiness, not an overpowering one. Another pitfall is adding the sakura-infused milk while it’s still warm; this will melt and deflate the whipped cream, resulting in a dense, icy texture. Ensure the infusion is completely cold before mixing.
Serving Suggestions
Serve scoops in small, chilled bowls or cones. Garnish with a fresh mint sprig or some shaved white chocolate to complement the floral notes. This ice cream pairs beautifully with light, buttery shortbread cookies, matcha financiers, or a simple slice of angel food cake. For an elegant touch, serve it alongside a cup of hot green tea.
Storage and Reheating Tips
Store your homemade sakura ice cream in a tightly sealed, freezer-safe container. To prevent ice crystals and freezer burn, press a layer of plastic wrap or parchment paper directly onto the surface of the ice cream before putting on the lid. It’s best enjoyed within 2 weeks for optimal flavor and texture.
Nutrition Facts (Estimated)
| Serving Size | 1/2 cup (approx. 90g) |
| Calories | 285 kcal |
| Fat | 19 g |
| Saturated Fat | 12 g |
| Unsaturated Fat | 7 g |
| Trans Fat | 0 g |
| Cholesterol | 70 mg |
| Sodium | 95 mg |
| Carbohydrates | 24 g |
| Fiber | 0 g |
| Sugar | 22 g |
| Protein | 4 g |
Frequently Asked Questions
Where can I buy salt-preserved cherry blossoms?
You can typically find them at Japanese or Asian grocery stores, especially in the spring. They are also widely available year-round from online specialty food retailers like Amazon or dedicated Japanese food sites.
Can I use an ice cream maker for this recipe?
Absolutely! Prepare the ice cream base as directed through step 6 (combining the whipped cream and condensed milk mixture). Instead of freezing in a loaf pan, pour the base into the frozen bowl of your ice cream maker and churn according to the manufacturer’s instructions, typically for 20-25 minutes. Then, transfer to a freezer-safe container to firm up for a few hours.
Why does sakura ice cream taste salty?
The unique flavor of traditional sakura desserts comes from ‘sakura-no-shiozuke,’ or salt-preserved blossoms. The salt perfectly balances the sweetness and enhances the delicate floral and cherry-like notes of the blossom. Our recipe controls this by rinsing and soaking the flowers, leaving just a hint of that pleasant savory flavor.
Conclusion
Creating this Sakura Cherry Blossom Ice Cream is like bottling the magic of spring. It’s an adventure in flavor that’s both elegant and comforting. I hope you fall in love with its unique, floral charm! If you make this recipe, I would be thrilled to see it. Please share a photo on Pinterest or Instagram and tag me so I can see your beautiful creation!