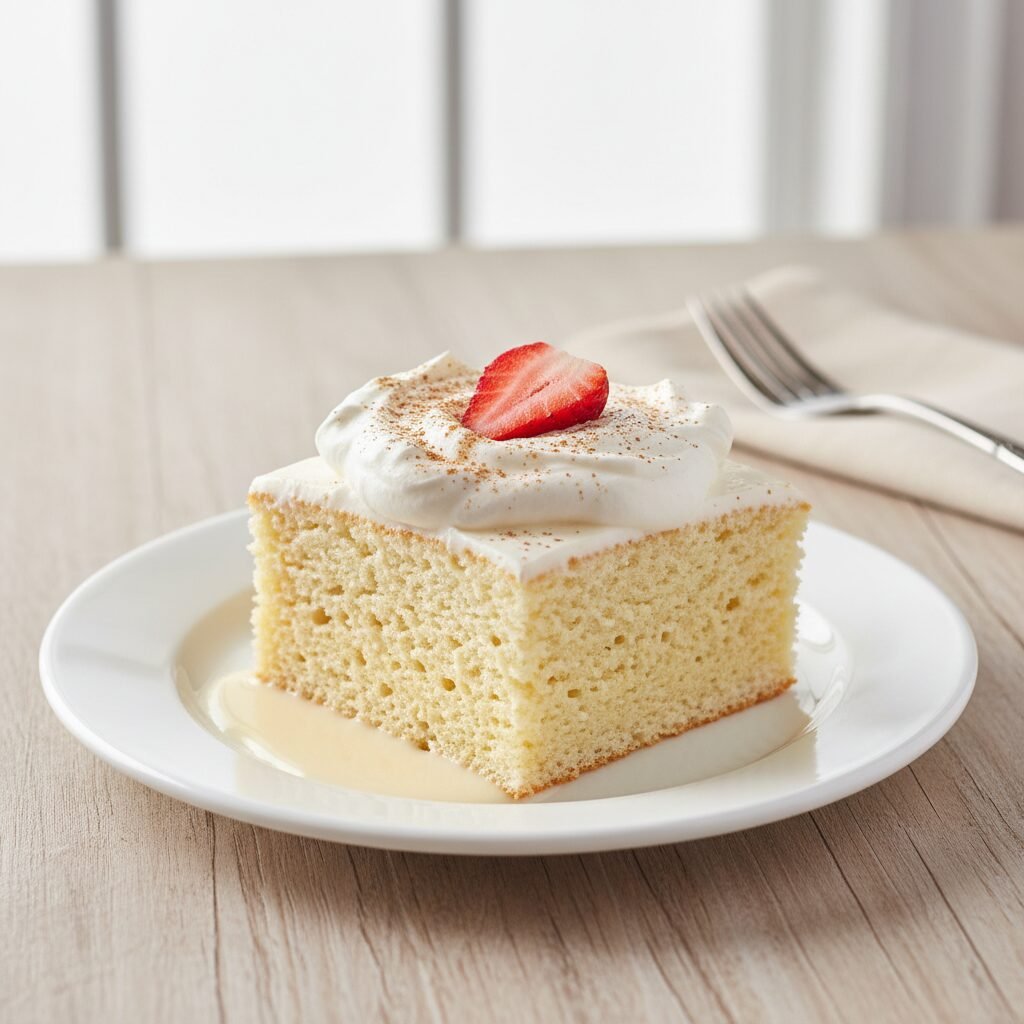
Dreamy Cloud-Like Tres Leches Cake
Tres Leches Pastel Recipe
Get ready to fall in love with the most divine, melt-in-your-mouth cake you’ve ever tasted. This Tres Leches Cake features an ultra-light sponge that soaks up a heavenly trio of sweet milks, creating a dessert that’s unbelievably moist yet never heavy. Topped with a fluffy cloud of whipped cream, it’s a truly unforgettable treat that will have everyone asking for the recipe.
25 minutes
30-35 minutes
4 hours (includes chilling time)
12-15 servings
Dessert
Baking
Mexican
N/A
Why You’ll Love This Recipe
- Incredibly moist with a rich, creamy milk soak
- Surprisingly light and airy sponge texture
- A perfect make-ahead dessert for parties and gatherings
- A show-stopping treat that’s easier to make than it looks
Equipment You’ll Need
- 9×13 inch baking pan (glass or light-colored metal is best)
- Stand mixer with whisk and paddle attachments (or a hand mixer)
- 3 large mixing bowls
- Rubber spatula
- Whisk
- Fork or wooden skewer
- Measuring cups and spoons
Ingredients
- For the Sponge Cake:
- 1 1/2 cups all-purpose flour
- 1 1/2 teaspoons baking powder
- 1/2 teaspoon salt
- 5 large eggs, separated
- 1 cup granulated sugar, divided
- 1/3 cup whole milk
- 1 teaspoon pure vanilla extract
- For the Three-Milk Soak (Tres Leches):
- 1 (12-ounce) can evaporated milk
- 1 (14-ounce) can sweetened condensed milk
- 1/2 cup heavy whipping cream or whole milk
- For the Whipped Cream Topping:
- 2 cups cold heavy whipping cream
- 1/2 cup powdered sugar (confectioners’ sugar)
- 1 teaspoon pure vanilla extract
- Ground cinnamon, for dusting
- Fresh berries or sliced peaches, for garnish (optional)
Instructions
- Step 1: Prep Your Oven and Pan. Preheat your oven to 350°F (175°C). Generously grease and flour a 9×13 inch baking pan. This step is crucial to prevent the cake from sticking.
- Step 2: Combine Dry Ingredients. In a medium bowl, whisk together the all-purpose flour, baking powder, and salt. Set this aside for later.
- Step 3: Mix the Egg Yolks. In a large bowl (or the bowl of your stand mixer), beat the 5 egg yolks with 3/4 cup of the granulated sugar. Beat on high speed until the mixture is pale yellow, thick, and fluffy, about 3-5 minutes. Scrape down the sides of the bowl, then mix in the 1/3 cup of whole milk and 1 teaspoon of vanilla extract until just combined.
- Step 4: Combine Wet and Dry. Gently fold the dry flour mixture into the egg yolk mixture in two or three additions. Be careful not to overmix; just combine until no dry streaks remain. The batter will be thick.
- Step 5: Whip the Egg Whites. In a separate, clean, and dry bowl, use clean beaters to whip the 5 egg whites on medium-high speed until soft peaks form. Gradually add the remaining 1/4 cup of granulated sugar and continue to beat until stiff, glossy peaks form. You should be able to turn the bowl upside down without the whites sliding out.
- Step 6: Fold in the Egg Whites. Gently fold about one-third of the whipped egg whites into the cake batter to lighten it up. Then, carefully fold in the remaining egg whites in two more additions. The key here is to be gentle – you want to keep all that air you just whipped into the whites to create a light, spongy cake.
- Step 7: Bake the Cake. Pour the finished batter into your prepared 9×13 inch pan and spread it into an even layer with your spatula. Bake for 30-35 minutes, or until a wooden skewer or toothpick inserted into the center comes out clean. The cake should be golden brown and spring back when lightly touched.
- Step 8: Cool and Poke. Let the cake cool in the pan on a wire rack for about 20-30 minutes. While it’s still warm, use a fork or a wooden skewer to poke holes all over the entire surface of the cake. Be generous with the holes – this is how the delicious milk mixture will soak in!
- Step 9: Prepare the Milk Soak. While the cake is cooling, whisk together the evaporated milk, sweetened condensed milk, and heavy cream in a large measuring cup or bowl with a spout. Mix until everything is smooth and fully combined.
- Step 10: Soak the Cake. Slowly and evenly pour the three-milk mixture over the warm, poked cake. It might seem like a lot of liquid, but be patient! The sponge will absorb it all. Start around the edges and work your way to the center.
- Step 11: Chill Completely. Cover the pan with plastic wrap and transfer it to the refrigerator. Let the cake chill for at least 3 hours, but overnight is even better. This allows the cake to fully absorb the milks and for the flavors to meld together beautifully.
- Step 12: Make the Whipped Topping. Just before serving, make the whipped cream. In a large, chilled bowl, beat the cold heavy whipping cream, powdered sugar, and vanilla extract with a mixer on medium-high speed until medium to stiff peaks form. Be careful not to overbeat, or it will turn grainy.
- Step 13: Frost and Garnish. Spread the whipped cream evenly over the top of the chilled cake. Garnish with a light dusting of ground cinnamon and, if you like, some fresh strawberries, raspberries, or sliced peaches.
- Step 14: Serve and Enjoy! Slice the cake into squares and serve it chilled directly from the pan. Watch as everyone enjoys a slice of pure heaven!
Expert Cooking Tips
- Use Room Temperature Ingredients: For the lightest, fluffiest sponge cake, ensure your eggs and milk are at room temperature before you begin mixing.
- Don’t Skip Separating the Eggs: Whipping the egg whites separately and folding them in is the secret to the cake’s signature airy texture. It’s an extra step, but it’s absolutely essential.
- Poke Generously: Don’t be shy when poking holes in the cake. The more holes you create, the more evenly the milk mixture will be absorbed, ensuring every bite is perfectly moist.
- Chill Your Tools for Whipped Cream: For the most stable whipped cream, place your mixing bowl and beaters in the freezer for about 15 minutes before you start whipping. This helps the cream whip up faster and hold its shape longer.
- Let It Rest Overnight: While you can serve it after 3 hours, this cake is truly at its peak the next day. The extended chilling time allows the sponge to become fully saturated and the flavors to deepen.
Substitutions and Variations
For a dairy-free version, you can experiment with full-fat canned coconut milk in place of evaporated milk, coconut condensed milk for the sweetened condensed milk, and a high-quality oat milk or almond milk for the whole milk/cream. The topping can be made with a chilled, full-fat canned coconut cream. For a gluten-free cake, a high-quality 1-to-1 gluten-free baking flour blend can be used in place of the all-purpose flour, but be aware the texture may be slightly denser.
Common Mistakes to Avoid
A common mistake is overmixing the cake batter after adding the flour, which can result in a tough, dense cake instead of a light sponge. Be sure to mix only until the ingredients are just combined. Another pitfall is not letting the cake chill long enough. Rushing the chilling process means the milks won’t fully absorb, leaving the cake soupy at the bottom and dry on top. Finally, be careful not to under-bake the cake; a sturdy sponge is necessary to hold all that liquid without falling apart.
Serving Suggestions
Serve this cake chilled, straight from the refrigerator. A classic dusting of cinnamon on top is a must. For a beautiful presentation and a touch of freshness, top each slice with fresh strawberries, raspberries, or thinly sliced mango. It pairs wonderfully with a cup of strong black coffee or a latte to balance its sweetness.
Storage and Reheating Tips
Tres Leches cake must be stored in the refrigerator due to the dairy-based soak and topping. Cover the baking pan tightly with plastic wrap or transfer slices to an airtight container. It will keep well for up to 4 days. In fact, many people find the flavor and texture are even better on day two! Freezing is not recommended as it can compromise the creamy, moist texture of the cake upon thawing.
Nutrition Facts (Estimated)
| Serving Size | 1 slice (1/12th of cake) |
| Calories | 435 kcal |
| Fat | 21 g |
| Saturated Fat | 13 g |
| Unsaturated Fat | 7 g |
| Trans Fat | 0 g |
| Cholesterol | 160 mg |
| Sodium | 240 mg |
| Carbohydrates | 54 g |
| Fiber | 1 g |
| Sugar | 38 g |
| Protein | 8 g |
Frequently Asked Questions
Can I make Tres Leches cake ahead of time?
Absolutely! It’s an ideal make-ahead dessert. You can bake the cake and add the milk soak a day or two in advance. Just keep it covered in the fridge and add the fresh whipped cream topping right before you plan to serve it for the best results.
Why is my cake soggy instead of just moist?
A perfect Tres Leches should be saturated and moist, but not swimming in a puddle of milk. If it’s soggy, it could be that the cake was slightly under-baked and didn’t have the structure to absorb the liquid properly, or the milk wasn’t poured slowly enough, allowing it to pool at the bottom rather than soak in evenly.
Can I use a different topping besides whipped cream?
While traditional whipped cream is classic, you could also top it with a meringue frosting, similar to a Swiss or Italian meringue. Toasting the meringue with a kitchen torch would add a lovely flavor and visual appeal. A simple cream cheese frosting would also be delicious, though less traditional.
Do I have to use all three milks?
Yes, the combination of evaporated milk, sweetened condensed milk, and heavy cream (or whole milk) is what gives the cake its name and signature flavor profile. Each milk contributes a unique element of richness, sweetness, and creaminess that can’t be replicated by using just one type.
Conclusion
There you have it – a truly spectacular Tres Leches Cake that is destined to become a family favorite. Every bite is a delightful experience, from the light-as-air sponge to the rich, creamy soak and fluffy topping. It’s the perfect dessert for any celebration, or just a Tuesday when you need a little something special. If you make this recipe, I would absolutely love to see it! Please share a photo on Pinterest or Instagram and tag me so I can see your beautiful creation.