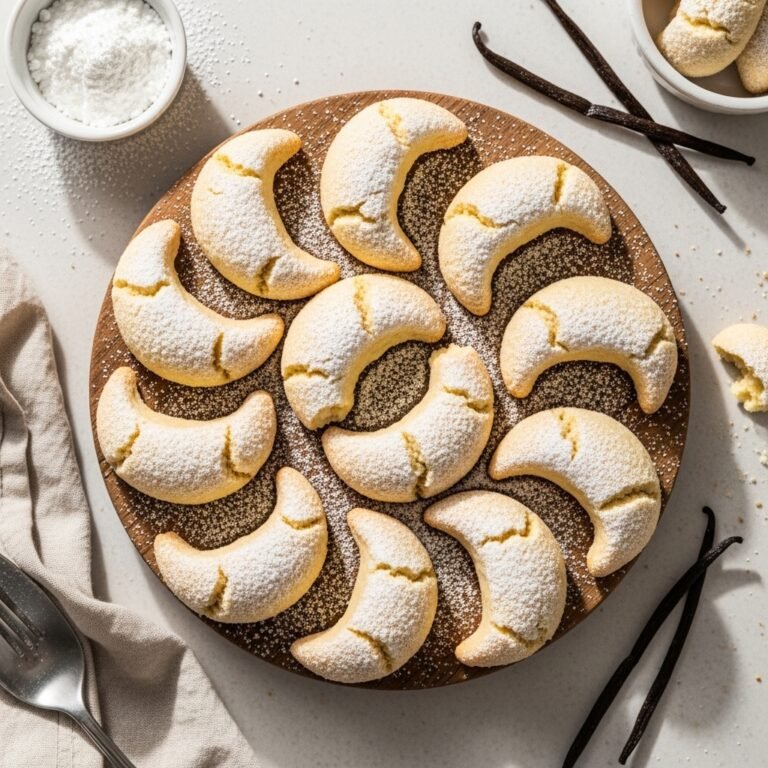
Delicate Homemade Wagashi: A Soft, Sweet Japanese Treat You Can Shape by Hand
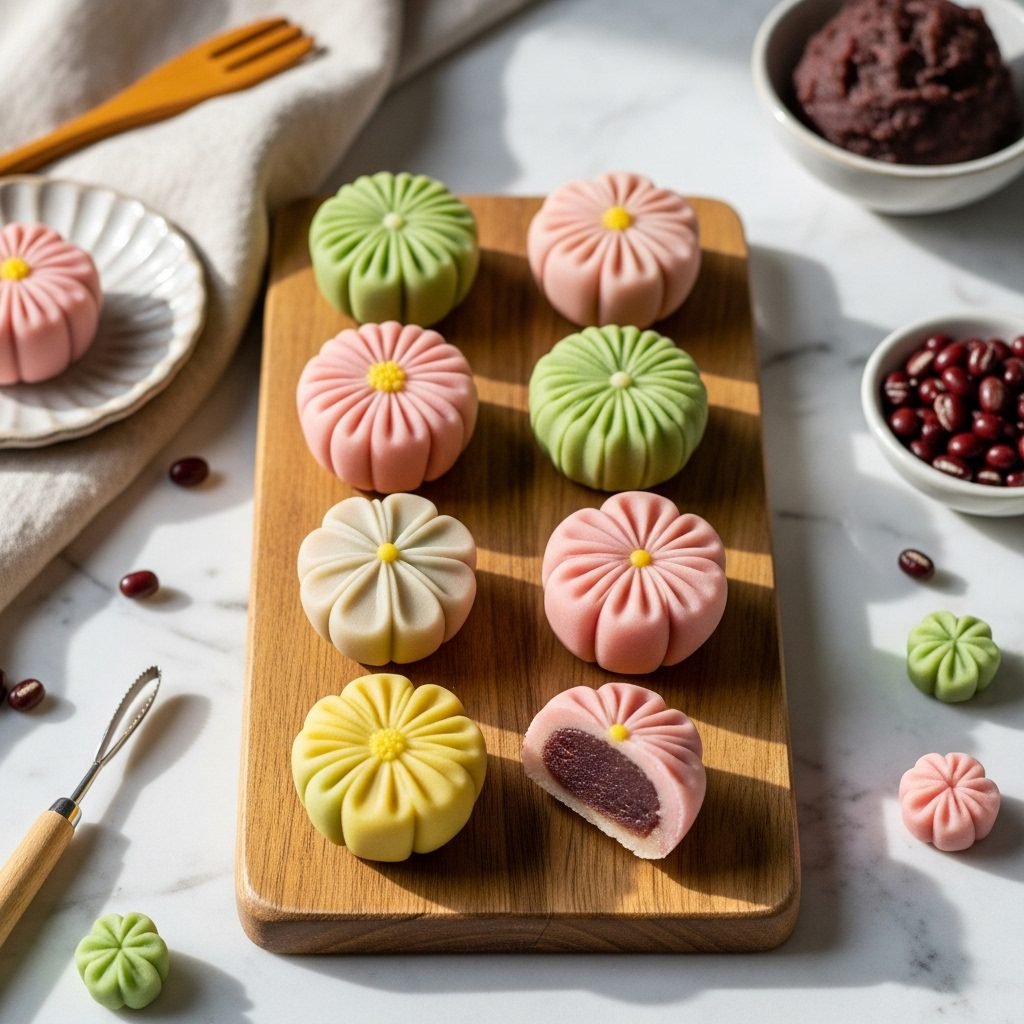
Wagashi is one of those desserts that feels almost poetic — soft, delicately sweet, and shaped with intention. These traditional Japanese confections are often made for tea time, meant to be admired before being enjoyed. They’re usually crafted from bean paste, glutinous rice flour, or natural colors, and they carry a gentle sweetness that pairs beautifully with green tea.
Making wagashi at home is surprisingly calming. The process feels artistic and soothing, almost like sculpting little edible flowers and seasonal shapes. And even if you’re new to Japanese sweets, this beginner-friendly version keeps things simple while still giving you that classic wagashi look and texture.
Why You’ll Love This Recipe
Homemade wagashi has a soft, almost mochi-like texture with a smooth, sweet filling inside. The dough is tender, the bean paste centers add comforting sweetness, and the final shapes feel fun and customizable.
This recipe shows you how to make nerikiri-style wagashi — a beautiful combination of white bean paste and glutinous rice flour that you can tint, mold, and decorate however you like.
Highlights at a Glance
- Taste: Mild sweetness with soft, melt-in-your-mouth bean paste.
- Texture: Smooth, tender, mochi-like exterior with a creamy center.
- Time: About 1 hour.
- Difficulty: Beginner-friendly.
- What Makes It Special: Fully customizable colors and shapes.
Ingredients
For the Nerikiri Dough
- 1 cup white bean paste (shiro-an)
- 1/2 cup glutinous rice flour
- 3 tbsp sugar
- 3 tbsp water
- Food coloring (gel or powder), optional
For the Filling
- 1 cup sweet red bean paste (anko), rolled into 8 small balls
Step-by-Step Instructions
- Prepare the filling: Divide red bean paste into 8 equal balls. Chill in the fridge while preparing the dough.
- Cook the nerikiri dough: In a nonstick pan, combine white bean paste, glutinous rice flour, sugar, and water. Stir over medium heat until thick and no longer sticky.
- Cool: Transfer to a plate and let cool until warm but pliable.
- Divide: Split the dough into 8 equal pieces. Tint each portion with food coloring if desired.
- Flatten and fill: Flatten one dough piece into a disc, place a red bean filling ball inside, and wrap tightly, sealing the edges.
- Shape: Gently roll into a smooth ball. Shape into flowers, leaves, or seasonal designs using toothpicks or small tools.
- Repeat: Continue until all wagashi are shaped.
- Rest: Let the finished pieces sit at room temperature for 10 minutes to settle.
Helpful Cooking Tips
- Keep your hands lightly damp to prevent sticking.
- Gel food coloring works best for soft pastel tones.
- Be gentle when shaping — wagashi dough is delicate.
- Use small tools like toothpicks, chopsticks, or sculpting picks for patterns.
- Chill the filling so it holds its shape during wrapping.
Ingredient Substitutions & Dietary Options
- White bean paste: Substitute with sweet potato paste for a different flavor.
- Red bean filling: Replace with black sesame paste, chestnut paste, or fruit jam.
- Food coloring: Use natural powders like matcha, beet, or turmeric.
- Sugar: Adjust amount based on your preference.
Common Mistakes to Avoid
- Overcooking the dough: Makes it crumbly instead of soft.
- Using hot dough: Can melt the filling; cool until warm.
- Handling too roughly: Causes cracks in the surface.
- Too much food coloring: Makes the dough sticky.
Serving Suggestions
- Serve with hot matcha or jasmine tea.
- Add to a dessert platter for a colorful display.
- Gift in small boxes lined with parchment.
- Make flower-themed shapes for spring or fall-tone designs for autumn.
Storage & Reheating Tips
- Store wagashi in an airtight container for 1–2 days.
- Keep at room temperature — refrigeration can dry them out.
- Avoid microwaving; serve at room temperature.
Frequently Asked Questions
Can I freeze wagashi?
Freezing changes the texture — best enjoyed fresh.
Why is my dough cracking?
It may be slightly dry; knead with damp hands.
Can I make the dough ahead?
Yes, keep wrapped tightly and shape the next day.
Do I need special tools?
No — toothpicks or chopsticks work beautifully.
Final Thoughts
Wagashi is a joyful blend of edible art and gentle, soothing flavor. Crafting each piece feels calm and intentional, and the result is a tray of soft, delicate sweets that look almost too pretty to eat.
Whether you’re making them for a gathering, a thoughtful gift, or simply a quiet creative afternoon, these wagashi are a lovely way to slow down and enjoy the process.
Short Summary
Soft nerikiri-style wagashi with a sweet red bean center — delicate, colorful, and beautifully simple to make.
If you enjoyed this recipe, feel free to share it on Pinterest or your favorite social platform!